- Home
- INSTALLATION AND Q&A
- RUGER SR SERIES PISTOL INSTALLTION INSTRUCTIONS
RUGER SR SERIES PISTOL INSTALLTION INSTRUCTIONS
GHOST TRIGGER CONTROL TRIGGER BAR RESETS & DROP-IN BAR TRIGGER BAR RESETS FOR RUGER SR SERIES
ROCKET 3.5 for Ruger SR, TACTICAL 5.0 for Ruger SR Series TCT and the 3.5 LB ULTIMATE Drop-in Trigger Bar Reset and all other TRIGGER BAR RESETS (This is what Ruger calls the part that controls the trigger pull weight and reset) These Installation Instructions are for the RUGER SR Series of pistols Only. Do not use the Dave Spaulding cut on the ROCKET 3.5 for Ruger SR, TACTICAL 5.0 for Ruger SR Series.
The ROCKET 3.5 & The TACTICAL 5.0 Trigger Bar Resets Require Minor Fitting. As with all of our trigger products the part is modified not the pistol, installation of our products will not affect your warranty. The 3.5 LB ULTIMATE Trigger Bar Resets is a drop-in part that require no fitting. As with all firearms activities obey all firearms safety rules. Do not point the disassembled firearm at anyone or anything you do want to kill or destroy. You are performing this installation at your own risk.
Items needed Prior To Beginning:
-
Eye protection
-
Plastic bags Large for disassembly and assembly & small bag for parts or a bin.
-
Ruger SR9 Manual
-
Ghost Armorer's Tool.
-
Grinder/Dremel Tool or Files for cutting the tab on Trigger Bar Resets that require fitting.
-
Please check out these Youtube videos produced by one of our customers Joaquin Torres very helpful. They are a good moving complement to our instructions.
Part 1:
http://www.youtube.com/watch?v=3SfmQJ9huxg
Part 2:
http://www.youtube.com/watch?v=6axHR1vK57c
Exploded View of the Ruger SR9
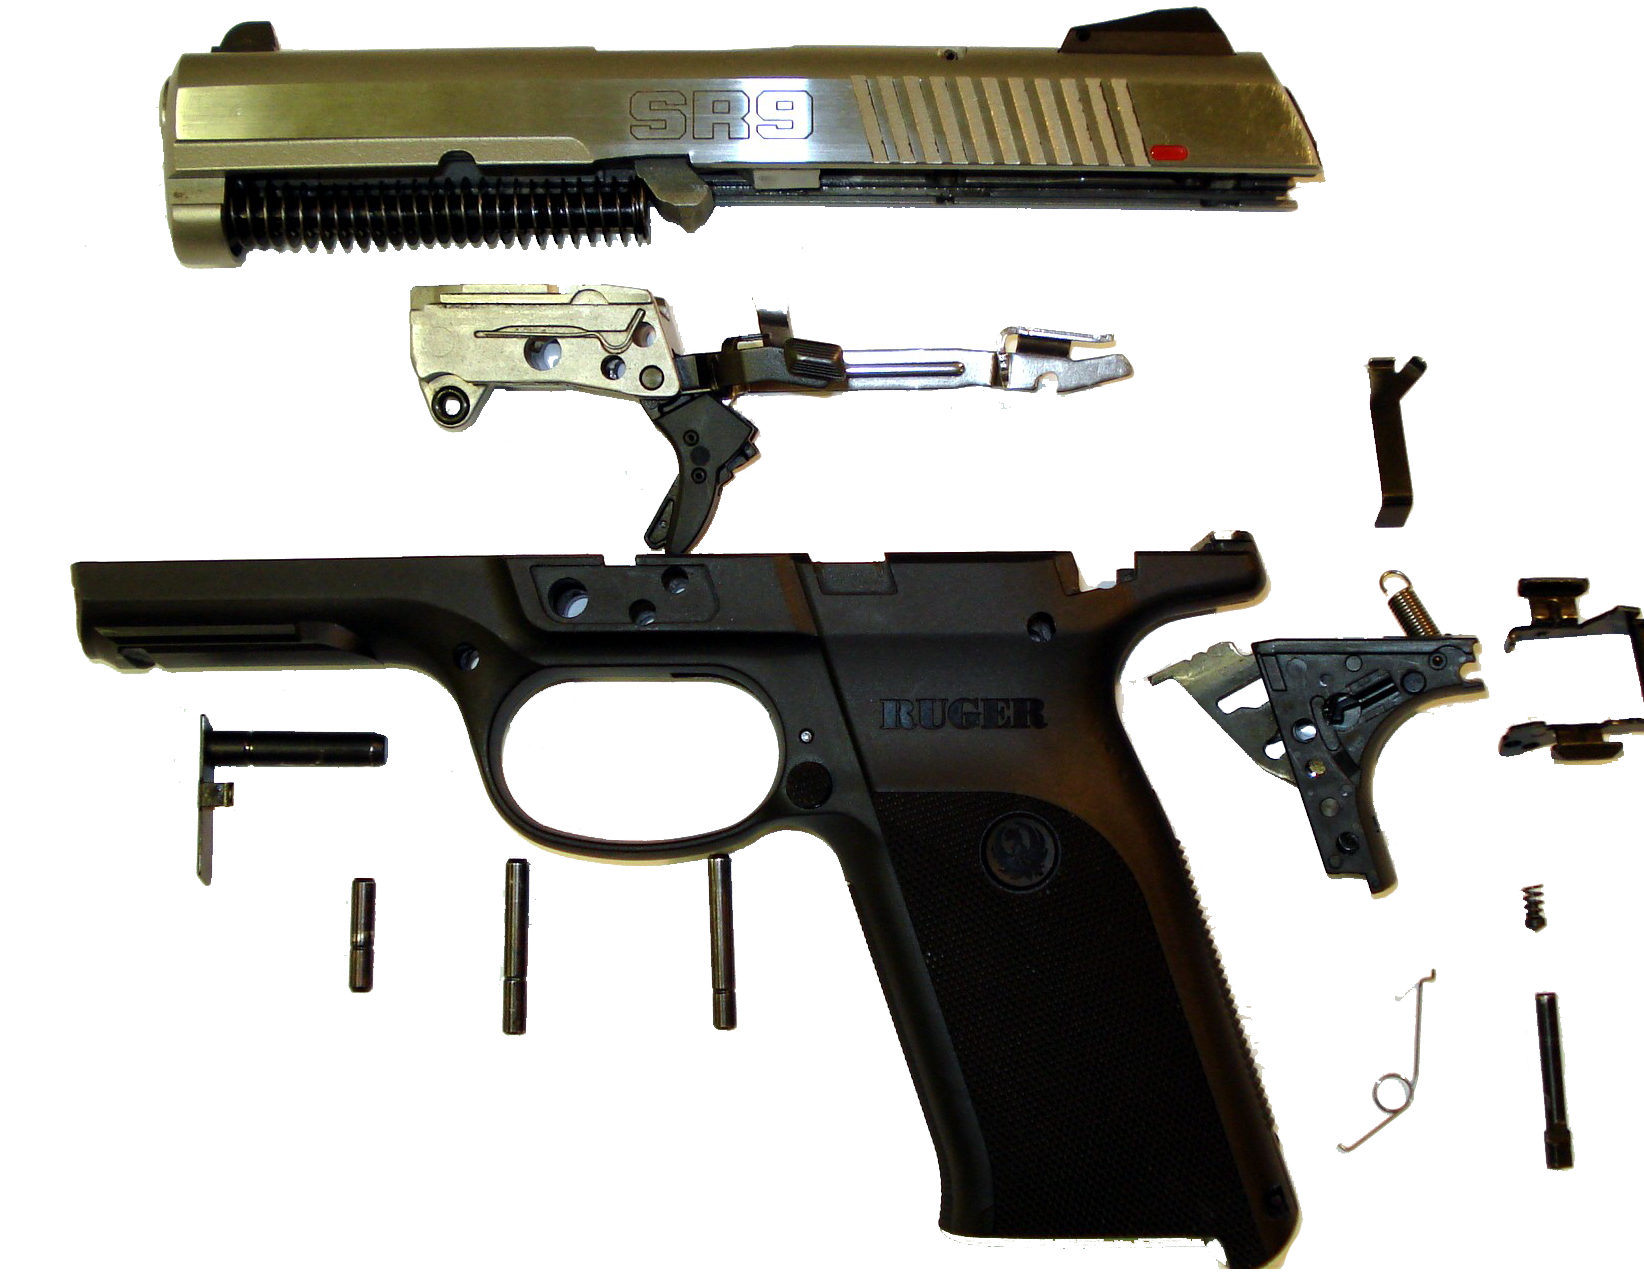
SECTION I: Pistol Disassembly
1. Prior to beginning make sure you have your Ruger SR Series Instruction Manual and a Ghost Armorer's Tool. We will use Ruger's nomenclature for parts and assemblies this will make it easier for you to follow our instructions. If you do not have a Ruger SR9 manual contact Ruger and they will send you one for free.
2. Read and follow the Instructions! Unload and verify that the pistol is unloaded.
3. Disassemble the pistol by removing the slide from the pistol. You do not need to remove the barrel or the recoil spring assembly from the slide. Set the slide assembly aside you do not need it until you test function the pistol or check the fitment of a trigger bar reset.
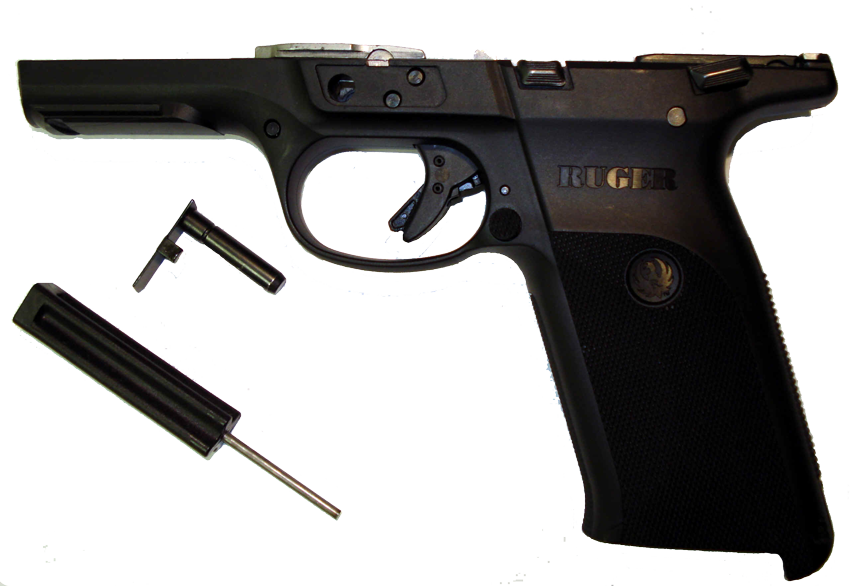
This is where we begin the disassembly/installation with the frame, GHOST Armorer's Tool and the takedown pin in front of us
4. Make sure the Manual Safety is in the down or off position. If the Manual Safety is up it will lock the Fire Control Housing Pin in place and disassembly of the frame will not be possible.
5. Removal of the Fire Control Housing Pin (FCHP); Because you had to "Press Ejector Down" to its lowest position to disassemble the pistol, which in turn cams down the trigger bar to de-cock the firing pin which also prevents engagement with and or the re-cocking of the firing pin (This is why you do not have to dry fire the pistol to disassemble it). The ejector should be at it's lowest position possible pushed down towards the bottom of the magazine well.
Note: The ejector on the Ruger SR9 has four functions; 1. It acts as a ejector, ejecting cartridges or spent casing from the pistol through the ejection port in the slide. 2. It acts as a disassembly aid by caming the trigger bar down to de-cock and prevent engagement with the firing pin so the slide can be removed without dry firing the pistol. 3. It has a cutout channel that serves as a drop safety when the trigger bar is in the full forward position. 4. It also serves as a retention device for the FCHP.
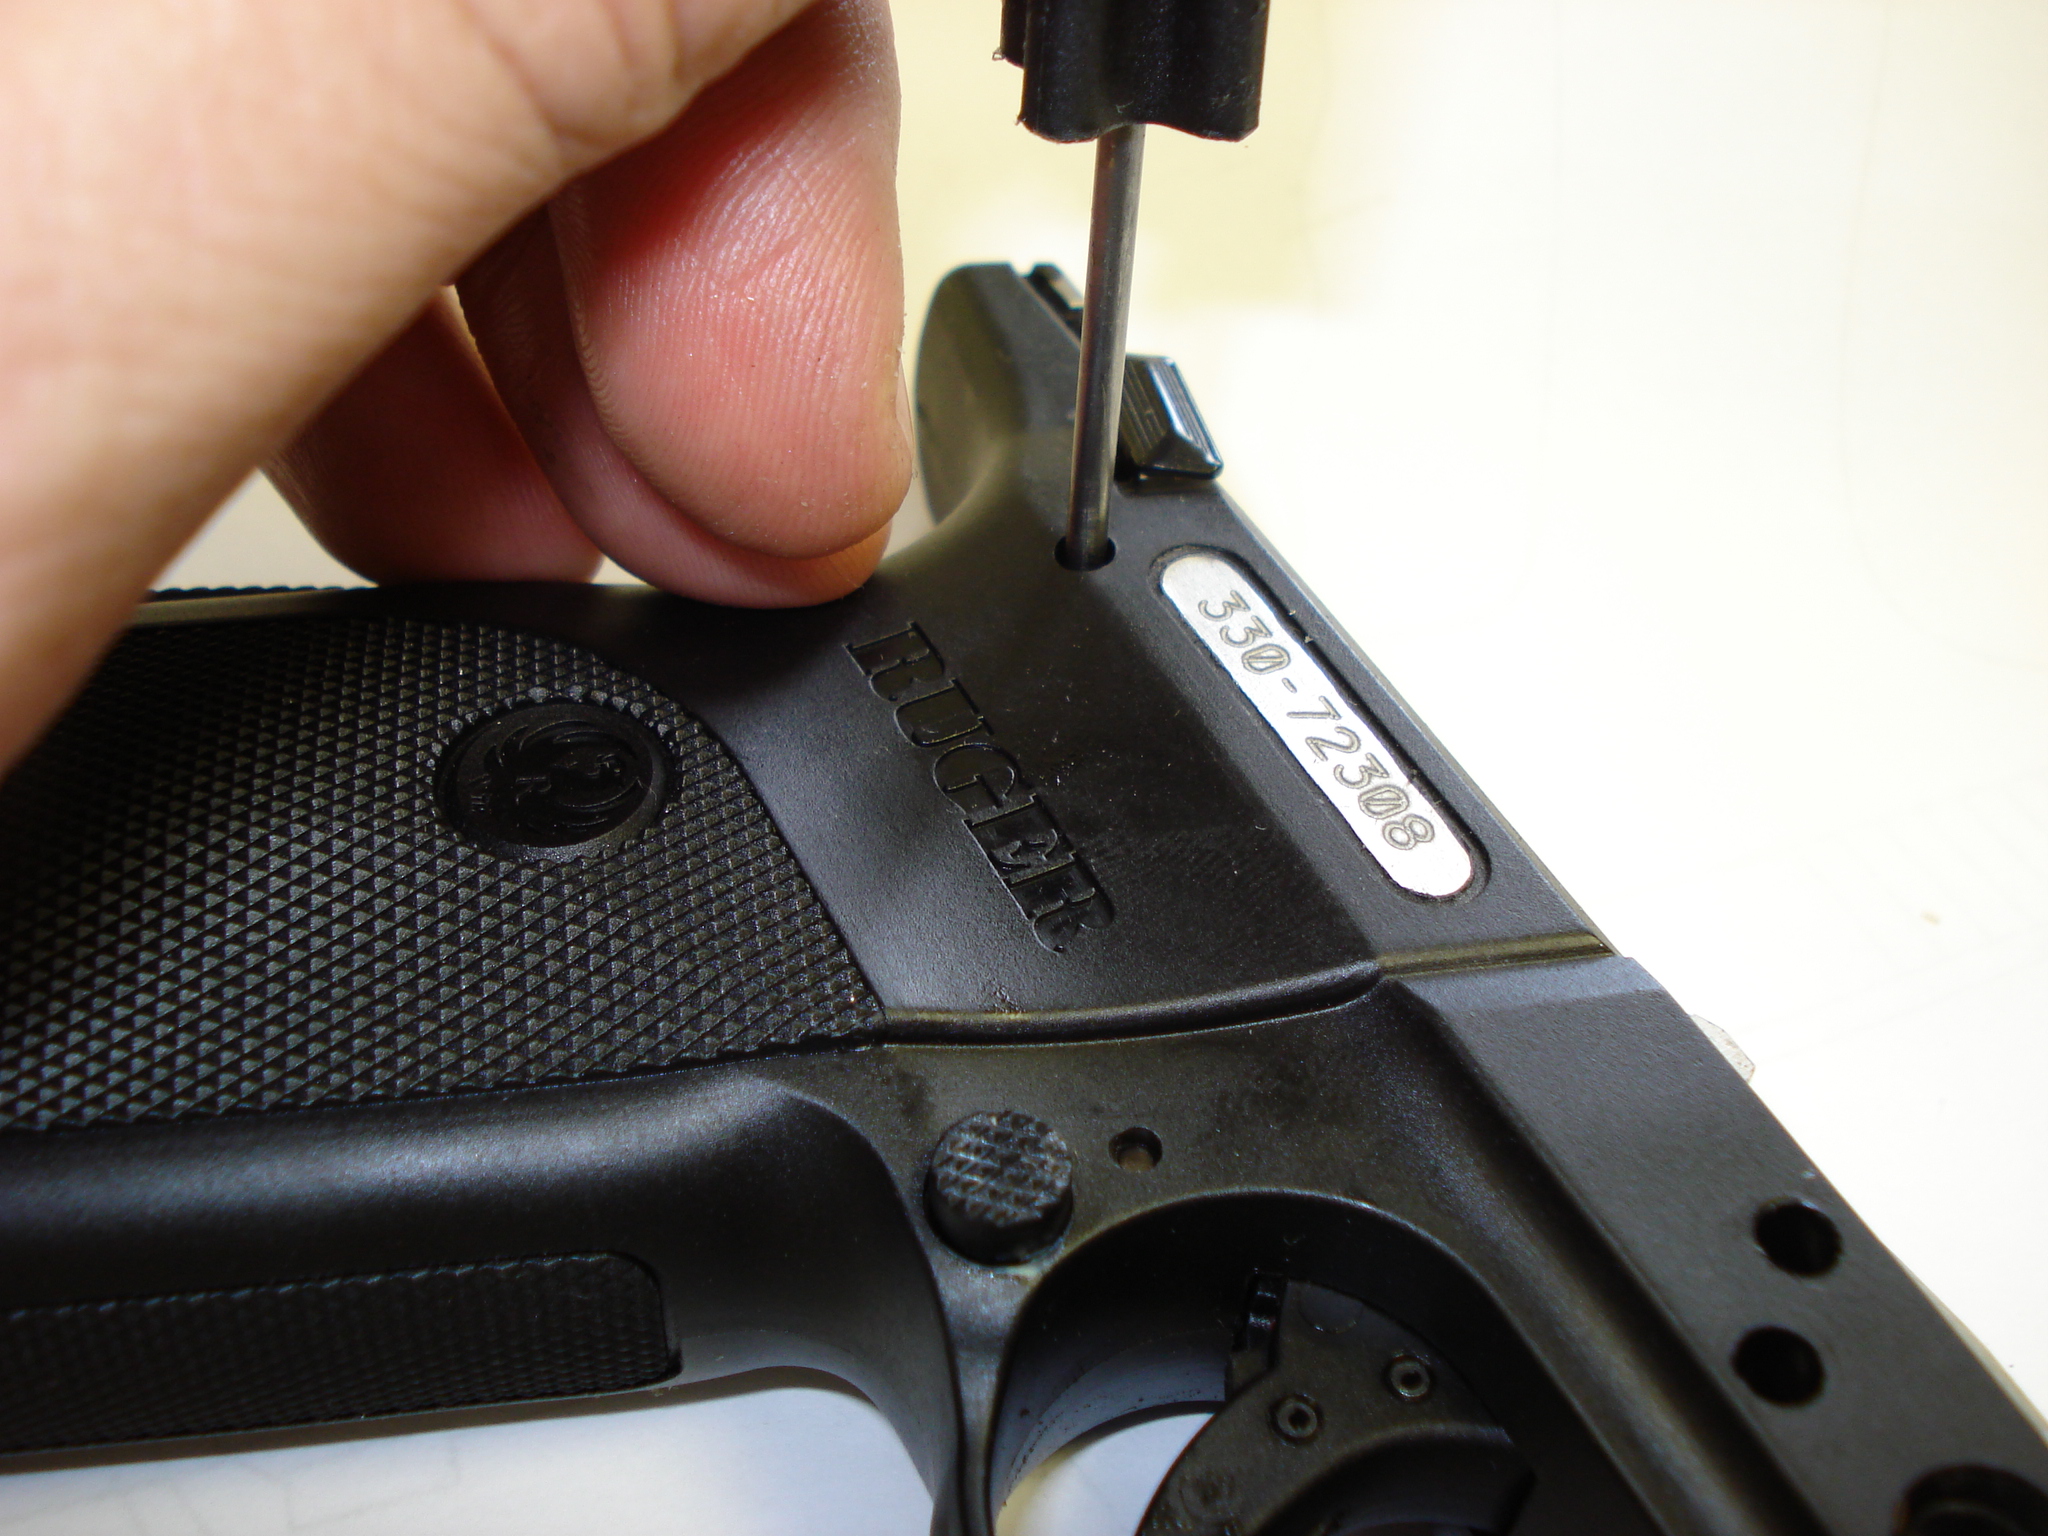
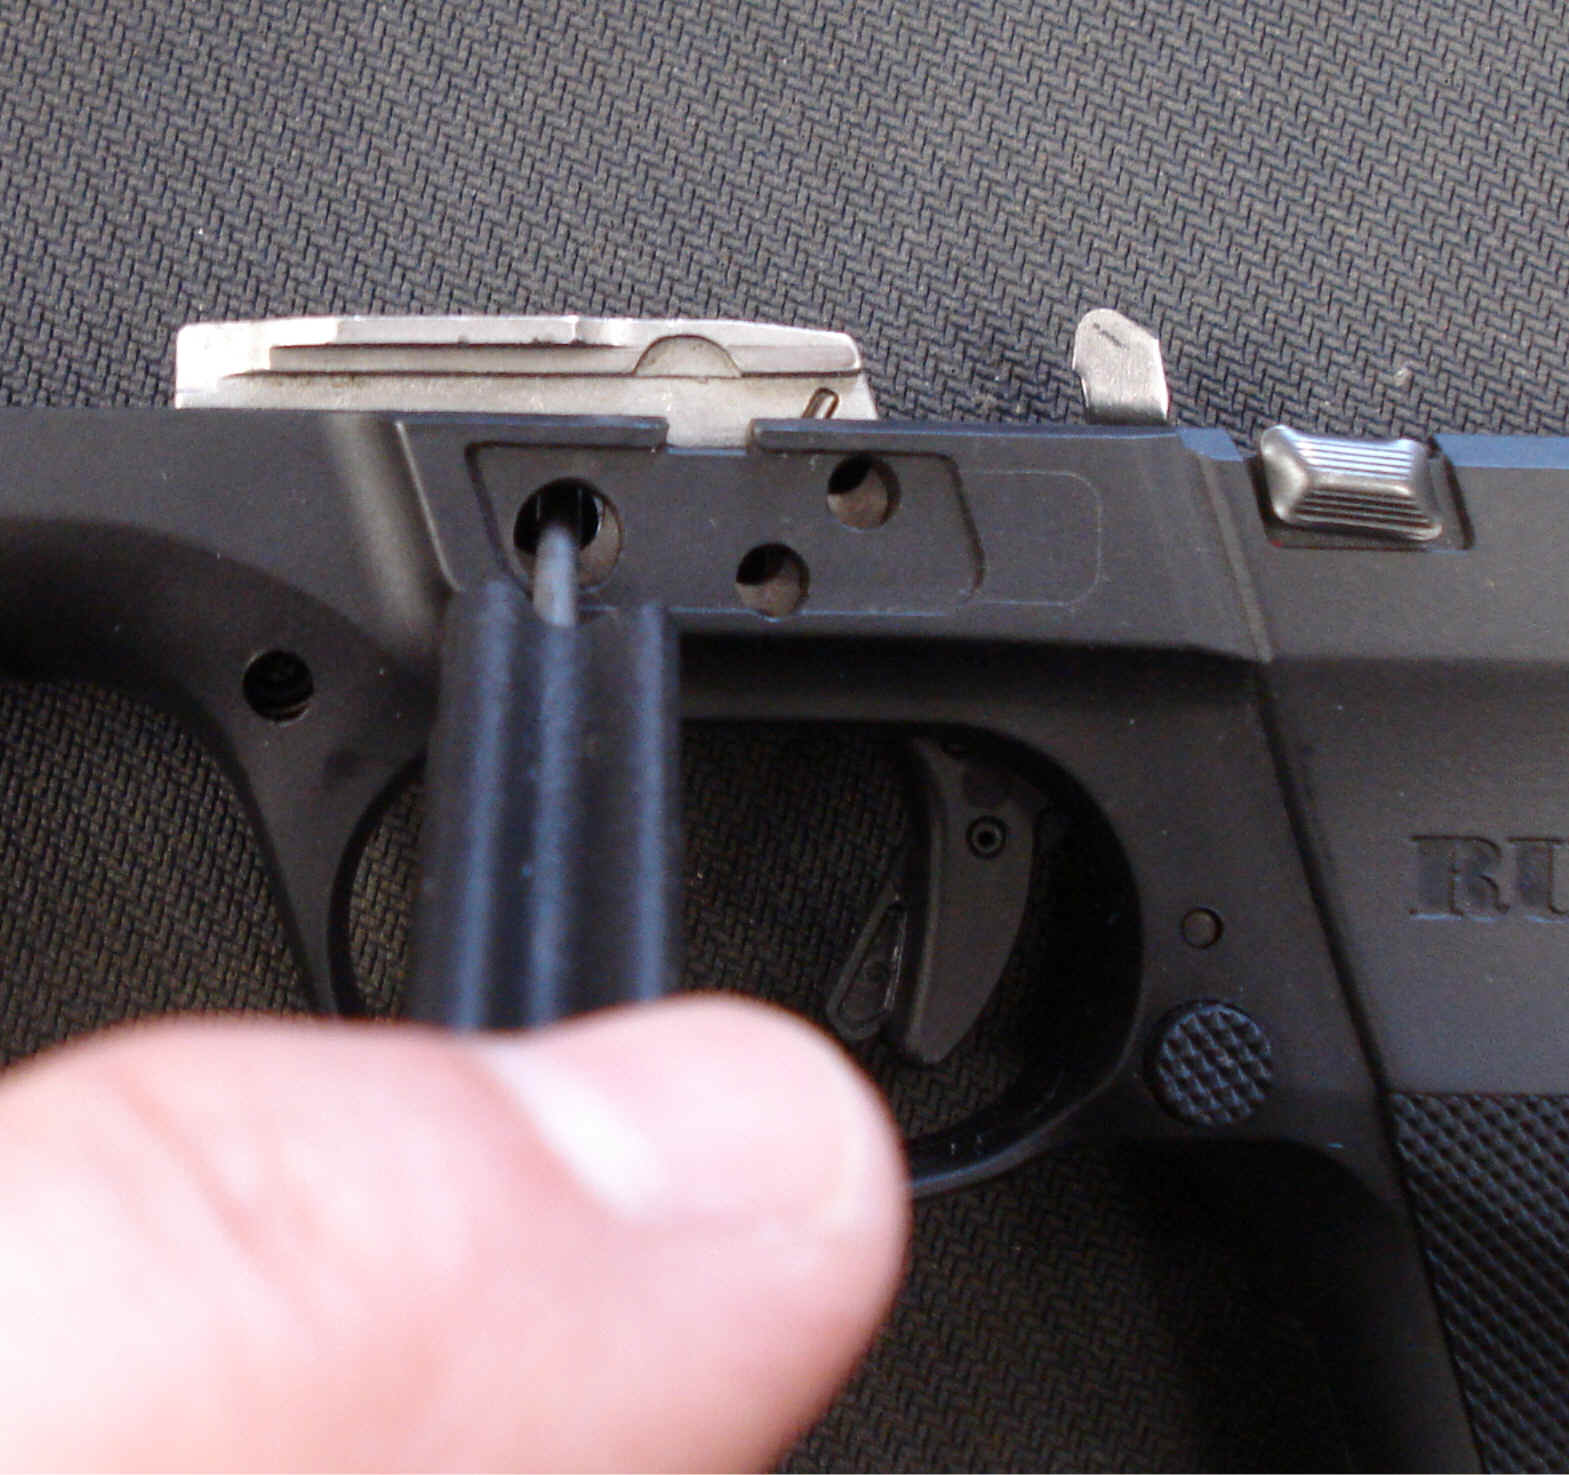
6. Place the ejector in its middle position this will permit you to push the FCHP from the right side (the right side of the pistol is looking at the rear of the pistol as you would when holding it with a conventional firing grip) of the pistol to the left. Note that the FCHP has a flat side that must be towards the rear of the pistol for proper assembly.
Photo of tool pushing FCHP-from right to left-the only way it will come out!
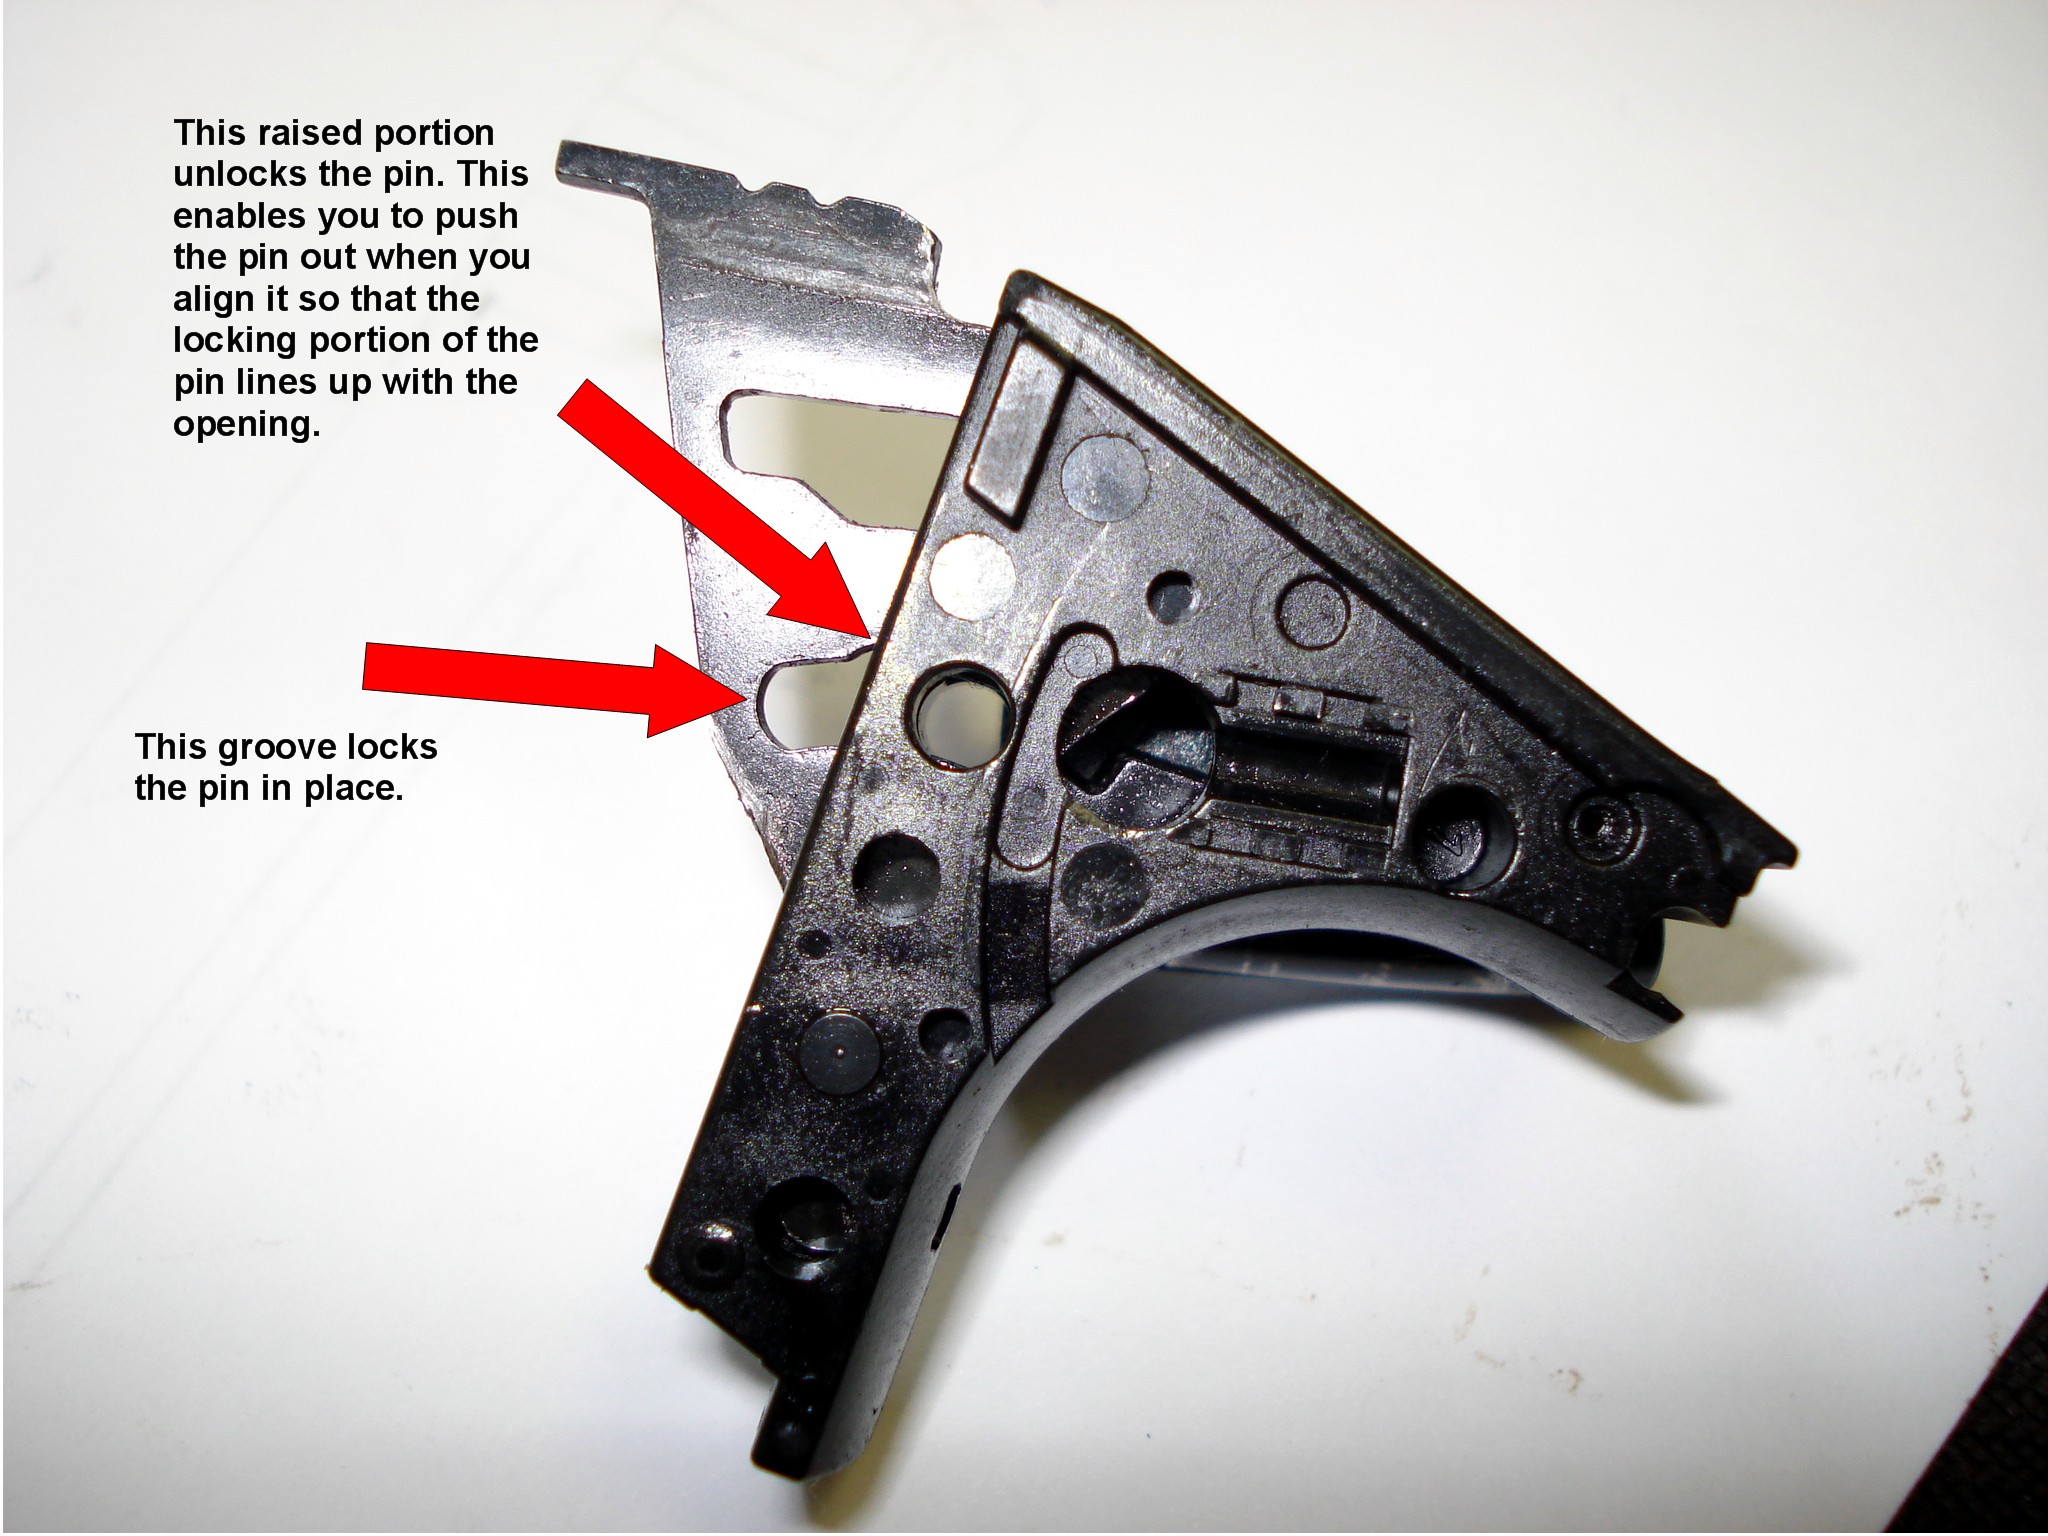
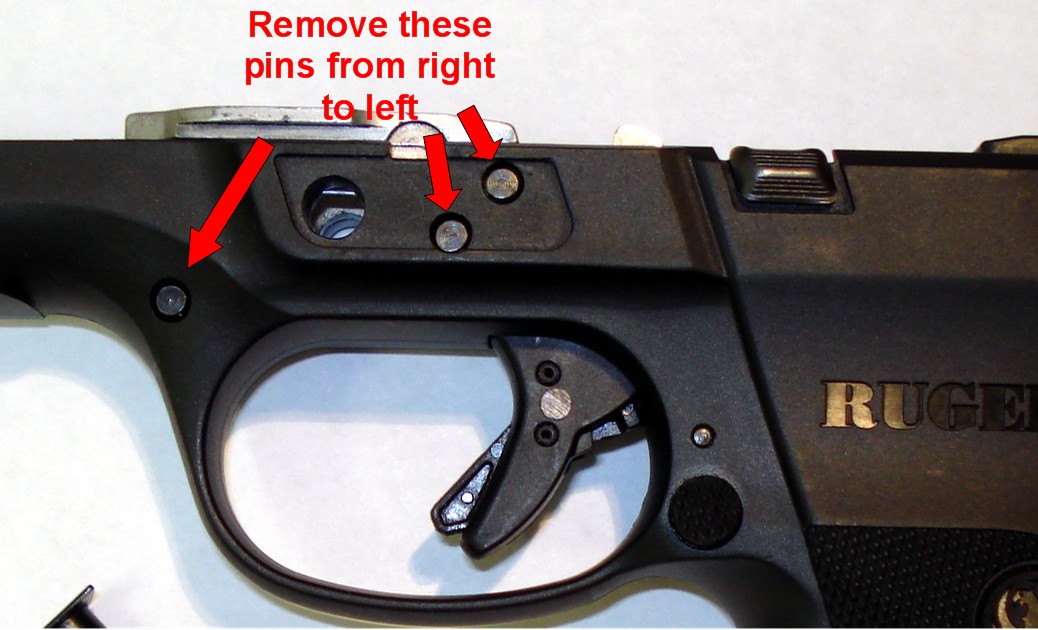
7. Remove the Camblock Pin, Front Camblock Pin, Lower & Camblock Pin, Upper from the right side pushing them to left. Note the groove in each pin. The orientation must be the same for proper re-installation.
8. Using your armorer's tool to lever (not force) the Fire Control Housing and the Camblock with the trigger and slide stop assemblies attached out of the pistols frame. Do not disassemble the trigger and slide stop from the Camblock. There is no reason to go further with the disassembly of these parts.
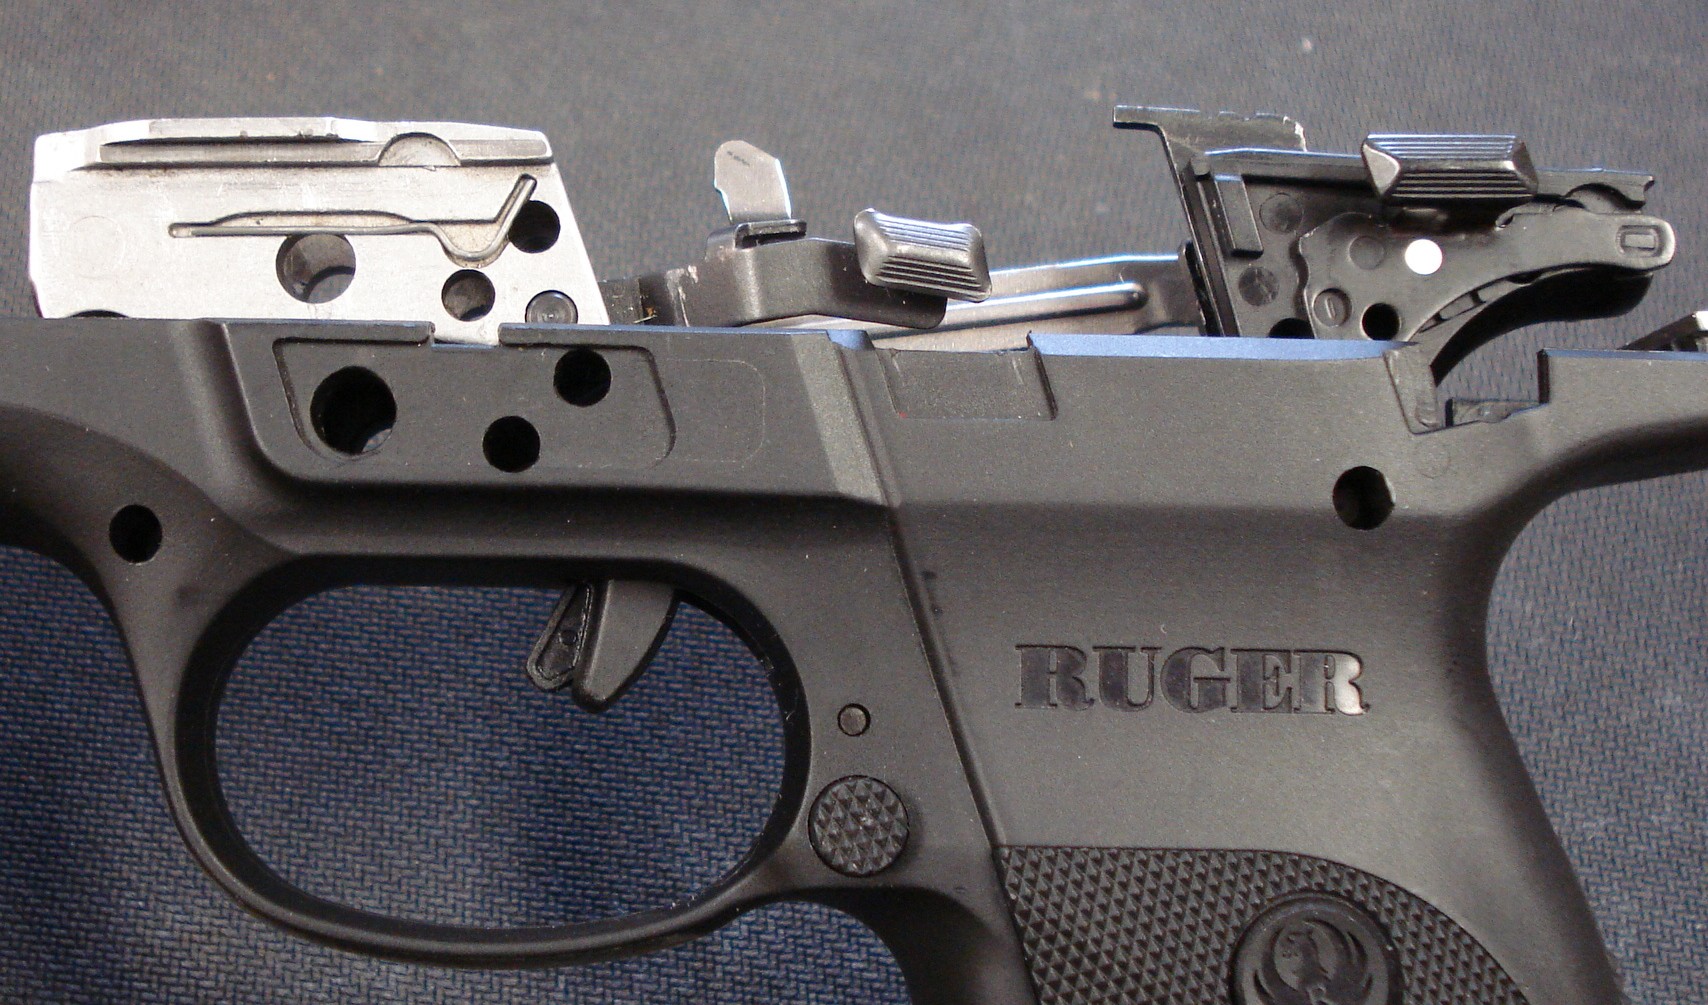
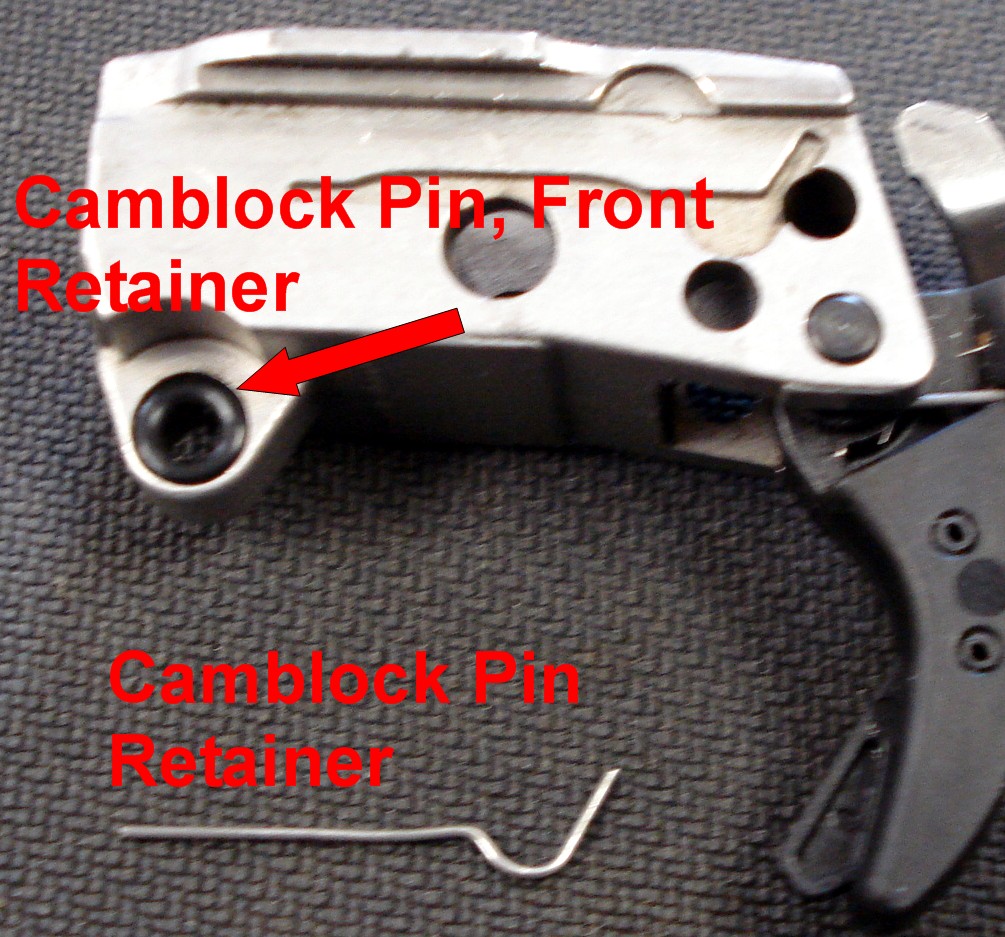
A. Remove these assemblies completely from the pistols frame. No parts will fall out or off of these assemblies with the possible exception of the Camblock Pin, Front Retainer or the Camblock Pin Retainer (see note below). If this happens just place the retainers in a plastic bag and reinstall when you are done.
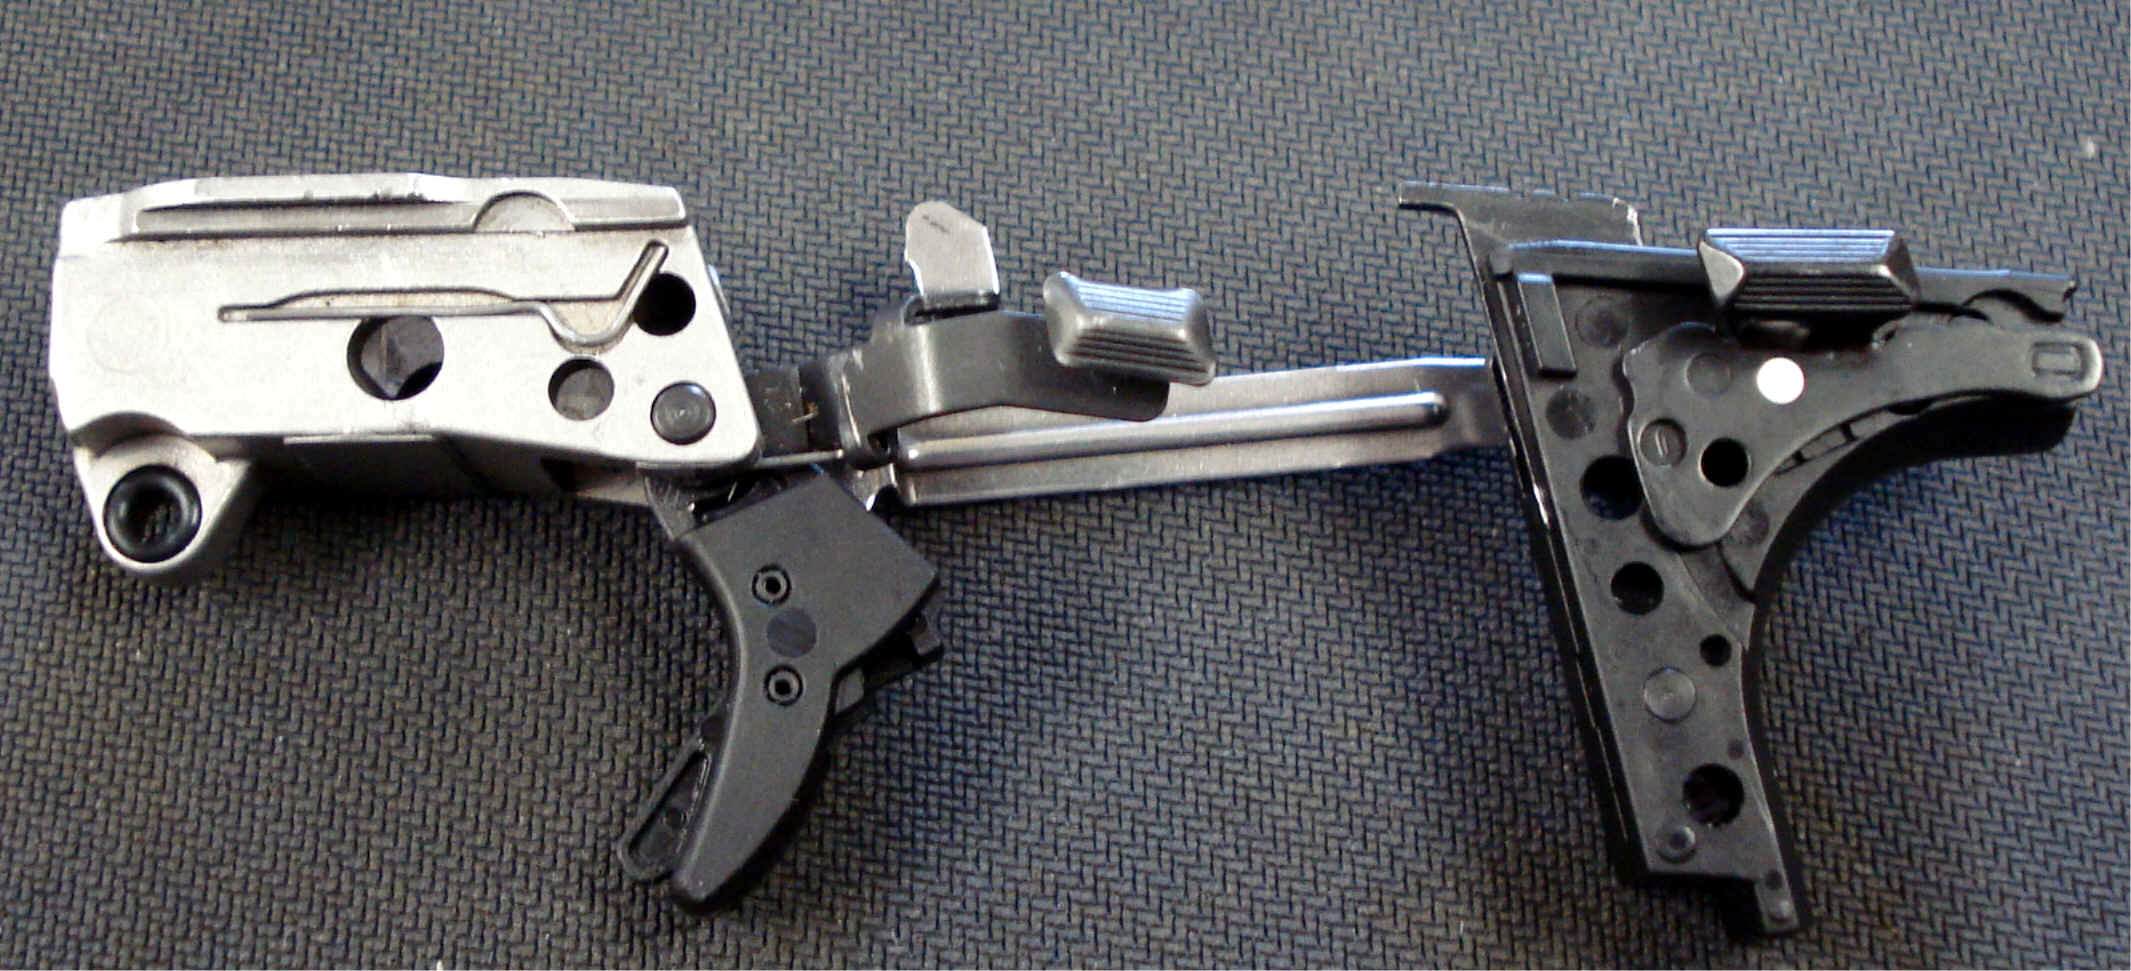
Note: the Camblock Pin, Front Retainer & the Camblock Pin Retainer should be removed during the fitting process to avoid losing them. If you are installing a drop-in trigger bar reset you may leave these retainers in place.
9. Disassembly of the Fire Control housing.

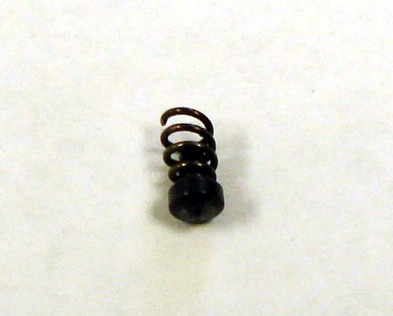
B. Remove the Thumb Safety Assembly, note the placement of the thumb and forefinger. This positioning is very important to capture and prevent the loss of the Safety Detent Plunger and Safety Detent Spring (you may want to perform this step inside a large plastic bag to prevent loss). Grip the Safety in this manner and lift (you have to lift the right side of the safety's tang to disassemble as well as assemble because there is a small nipple formed into the safety to limit its movement) the left safety tab slightly out from the housing and move the safety down and back towards the bottom of the FCH. You feel the Safety Detent Plunger slightly ping your forefinger. Turn the FCH down towards your work surface and the Safety Detent Plunger and Safety Detent Spring should fall free, place these items in a plastic bag or bin.
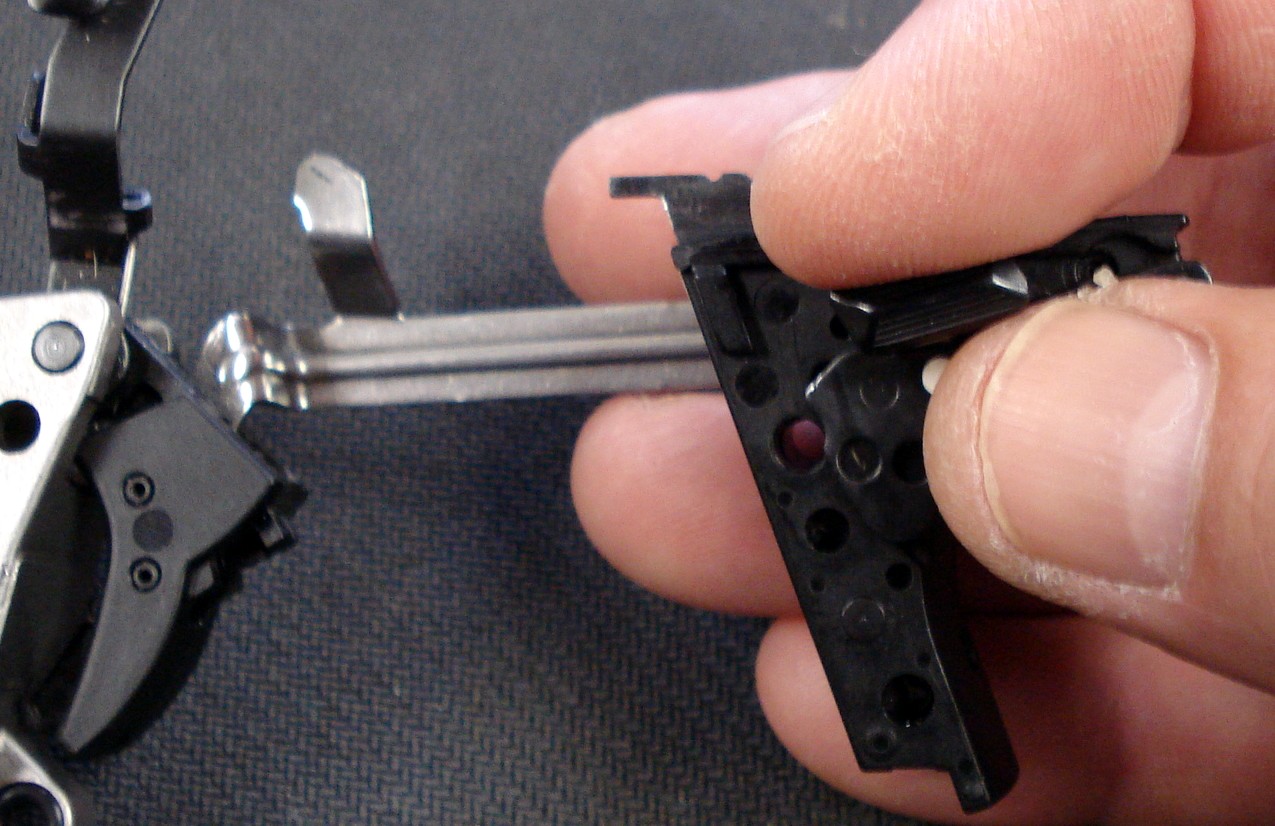
You may want to disassemble this assembly in a plastic bag the Safety Detent and Spring will try to fly away.
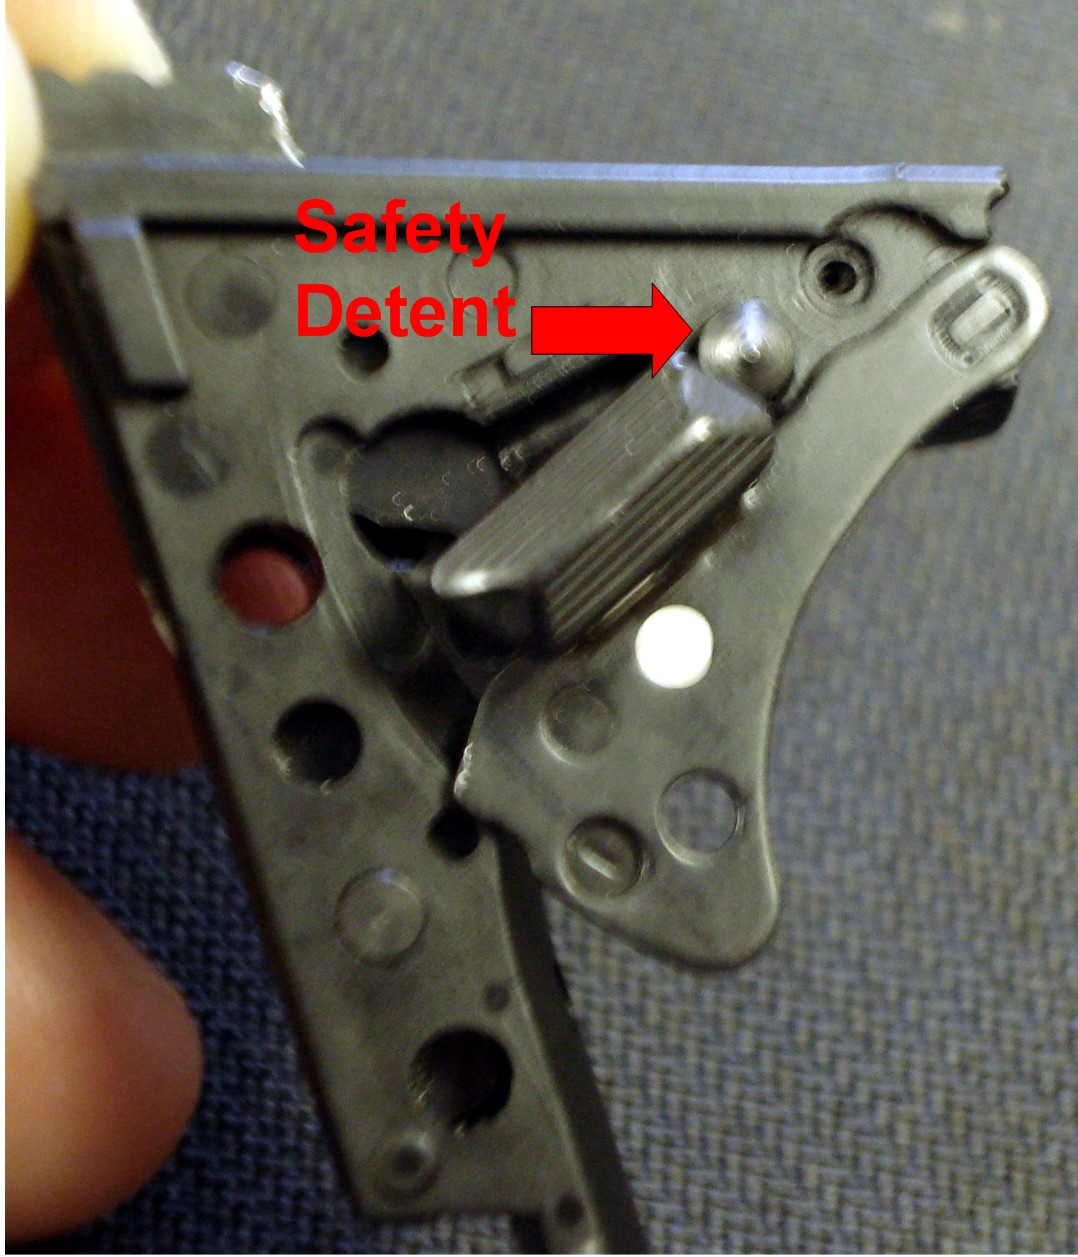
Safety Detent and Spring removed.
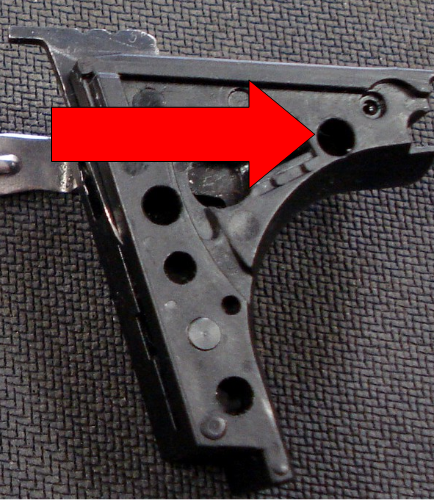
Rotate the safety so that it is at the rear of the FCH as shown below. Pull the safety straight back it will come out of the FCH (it is a capture fit). Place safety in a bag or bin.
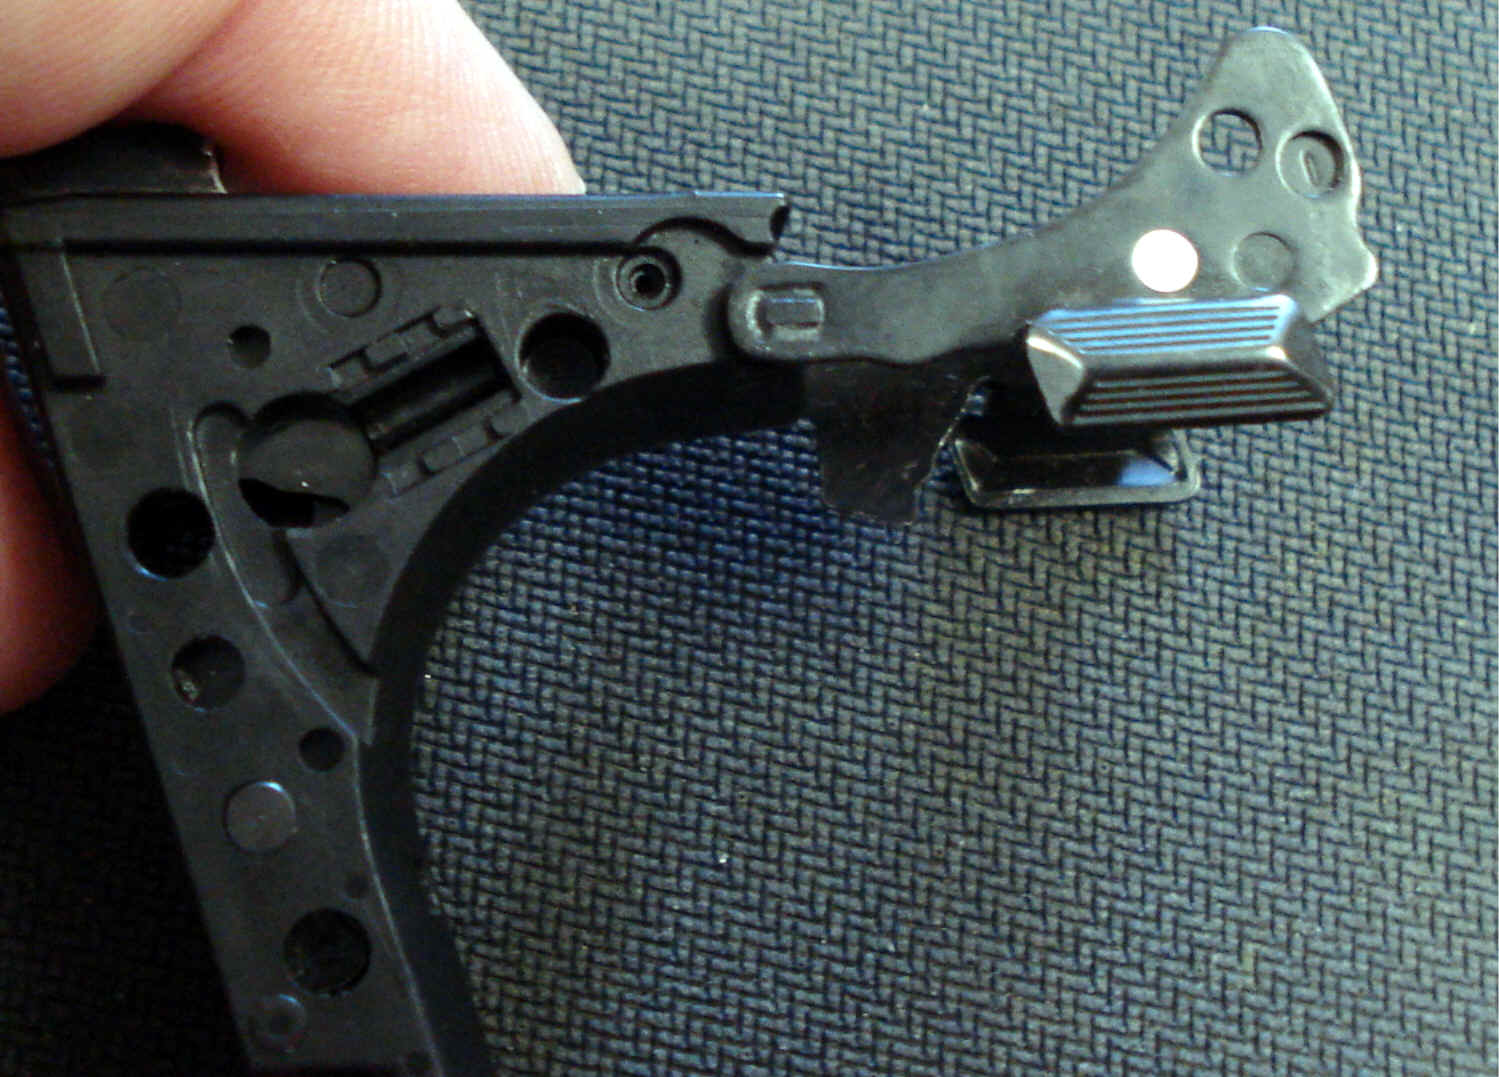
C. Remove the trigger bar. Once the safety is removed the trigger bar is pulled to the rear by the Trigger Bar Spring.
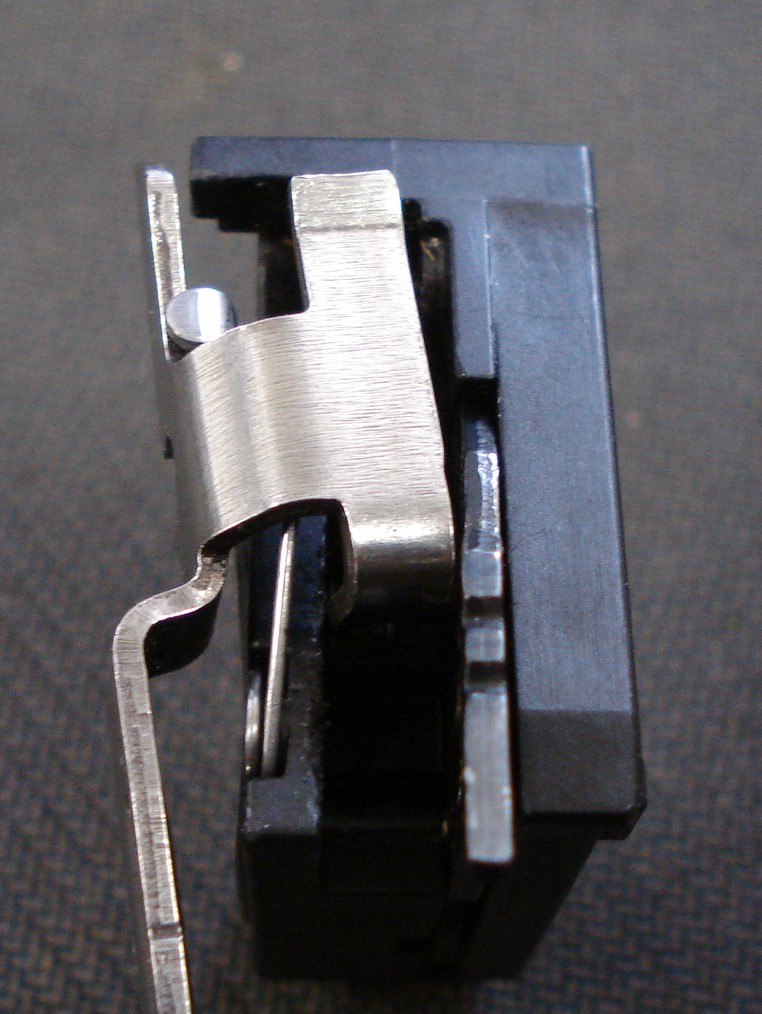
D-1-D-2. Hold FCH and pull the trigger bar forward and rotate the rear of the trigger bar to the left.
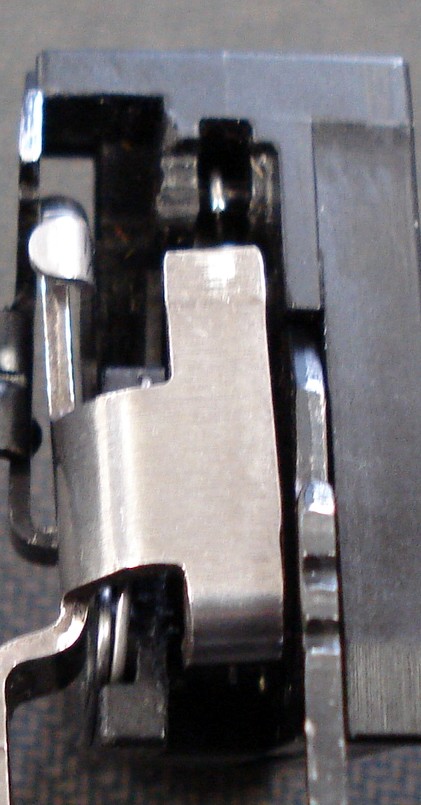
D.2 See below.
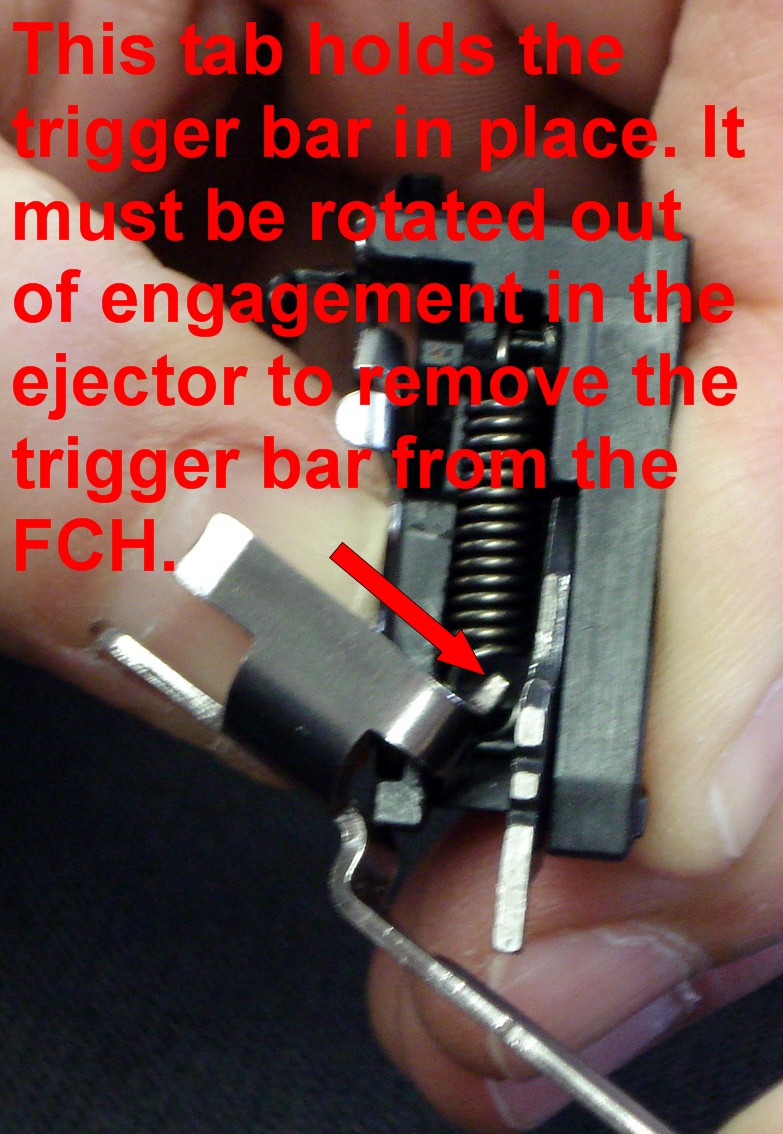
E. Lift the trigger out of the housing and unhook the trigger spring. Leave the trigger spring attached to the FCH.
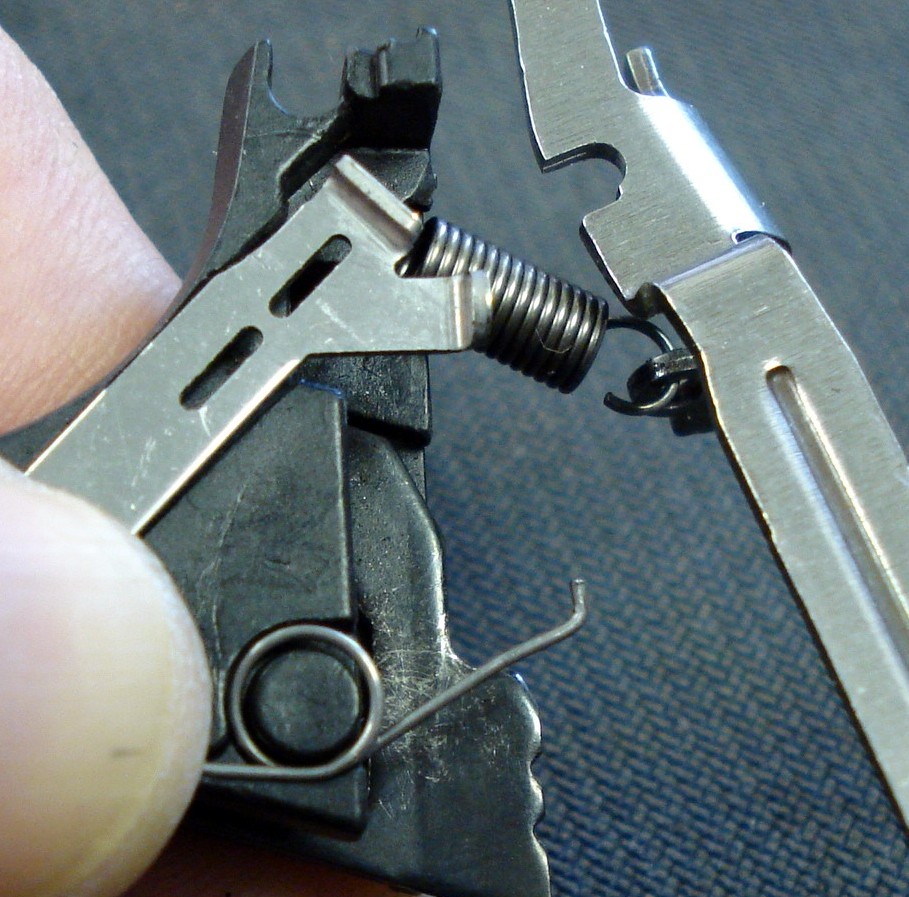
F. Remove the Trigger Bar Lift Spring and the Trigger Reset Bar
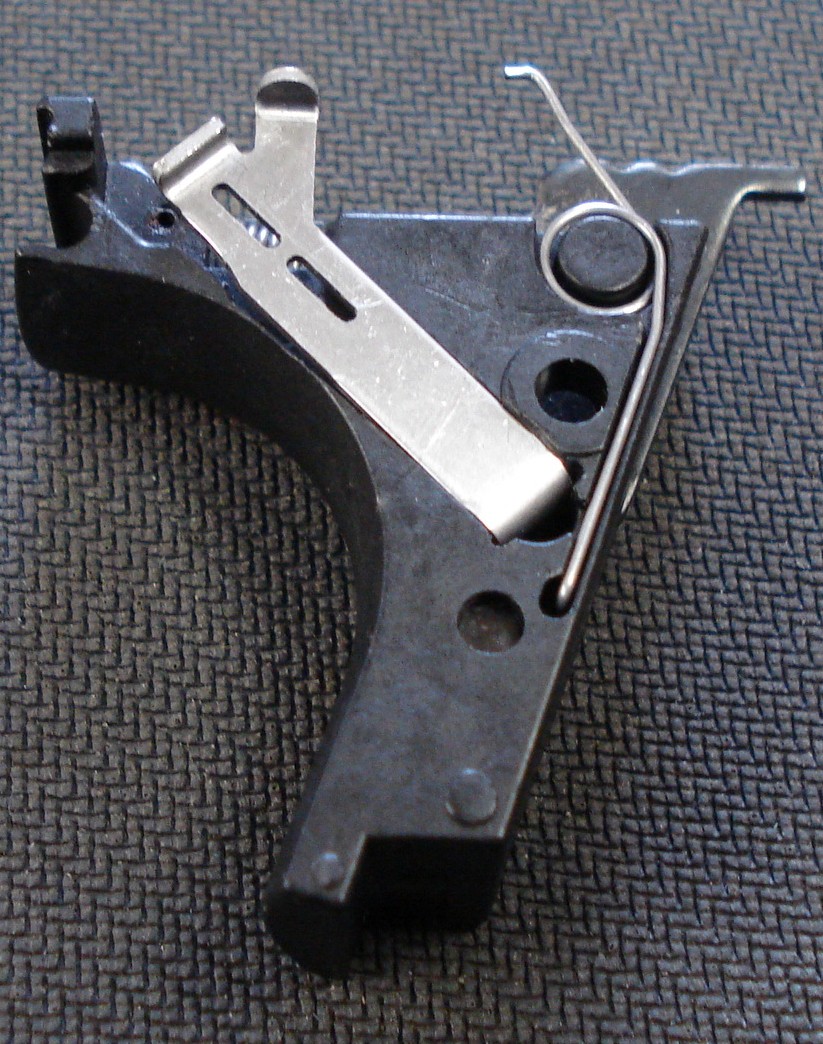
G. Removing Trigger Lift Spring-lift straight out.
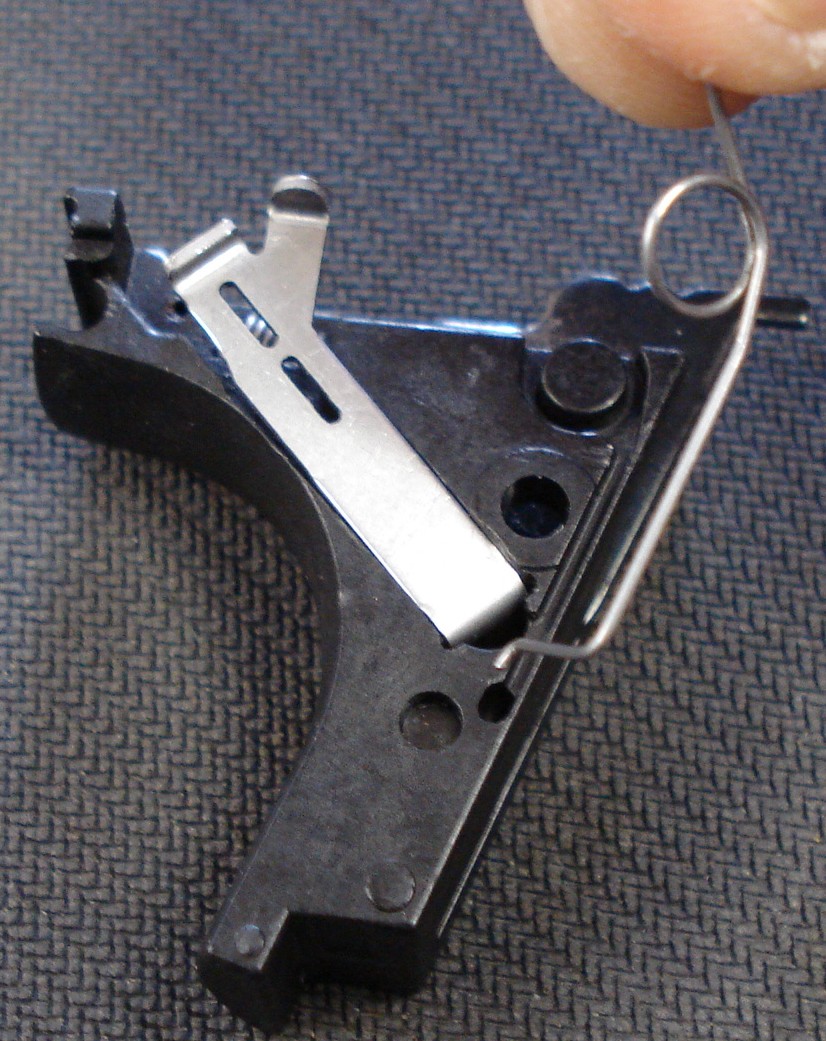
H. Trigger Bar Reset removal-slide the armorer's tool or a flat head screw driver down behind the trigger bar reset and the FCH towards the base of the trigger bar reset and lever it out.
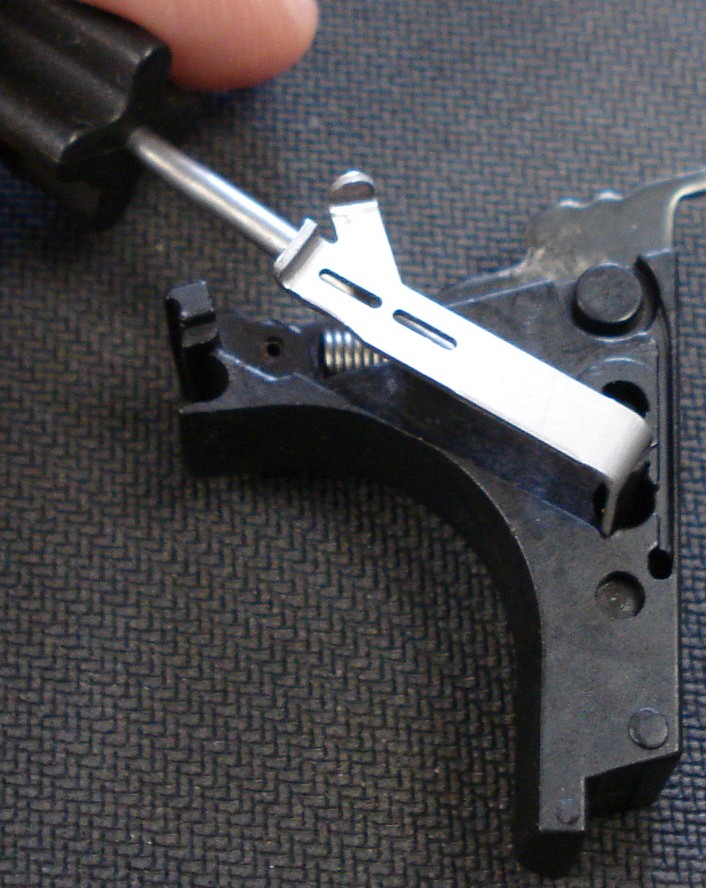
-FCH disassembled-
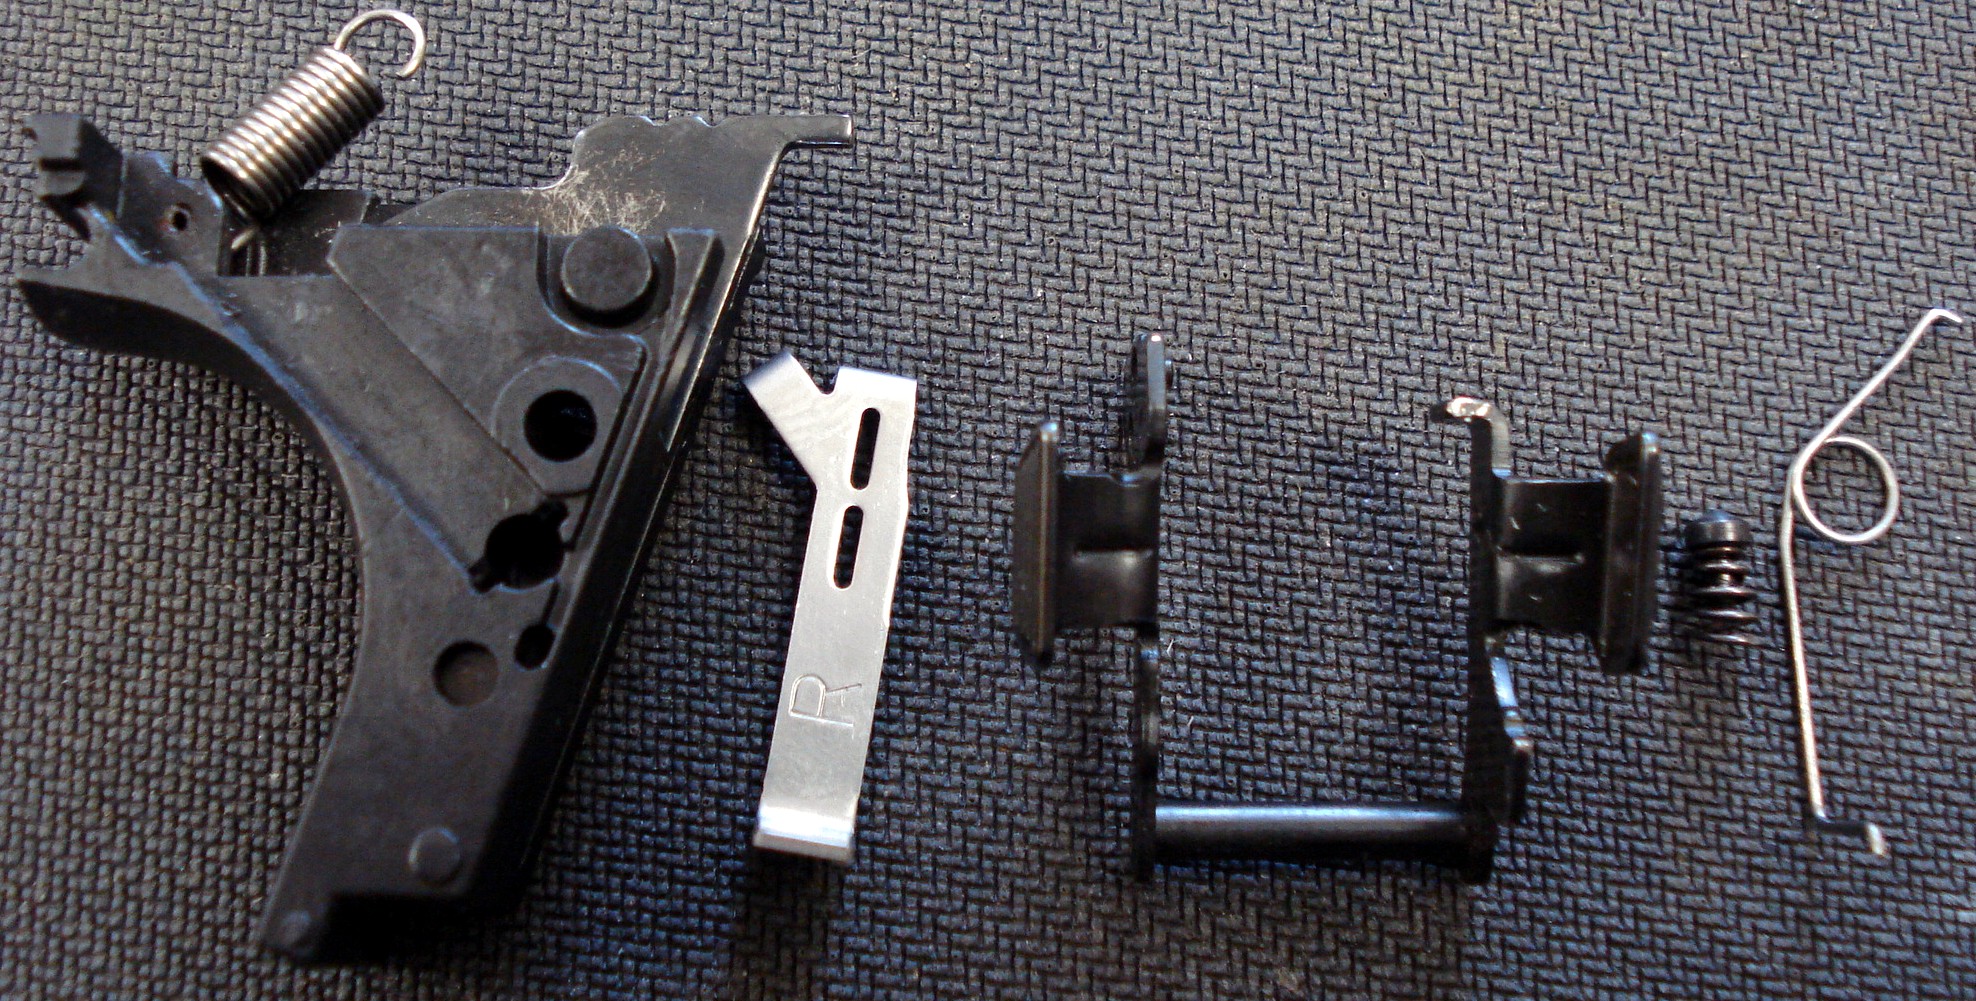
SECTION II: Installation of the Ghost Drop-in Trigger Reset Bar & Pistol Reassembly
These trigger bar resets are Drop-Ins they require no fitting. Install and shoot.
Check the bend of the Ghost Trigger Bar Reset against your pistols. Lay the Ghost on top of the Ruger. Insure they are bent at the nearly the same angle.
Install the Ghost Inc. trigger reset bar into the FCH.

Push the Trigger Lift Spring-lift in. Note the slight bend, angle in accordingly.

Trigger Reset Bar, Trigger Lift Spring & FCH.
Please note the Trigger Lift Spring must be inserted correctly for the pistol to function properly.

Next install the Safety Detent and Spring. Use caution once again you may want to assemble this assembly in a plastic bag the Safety Detent and Spring will try to fly away. You have to lift the right side of the safety's tang to assemble because there is a small nipple formed into the safety to limit its movement and you must raise this nipple up so that it will pass freely into the recess that permits it to move with in its range of function.
BE PATIENT!!

Place the safety in the off position.
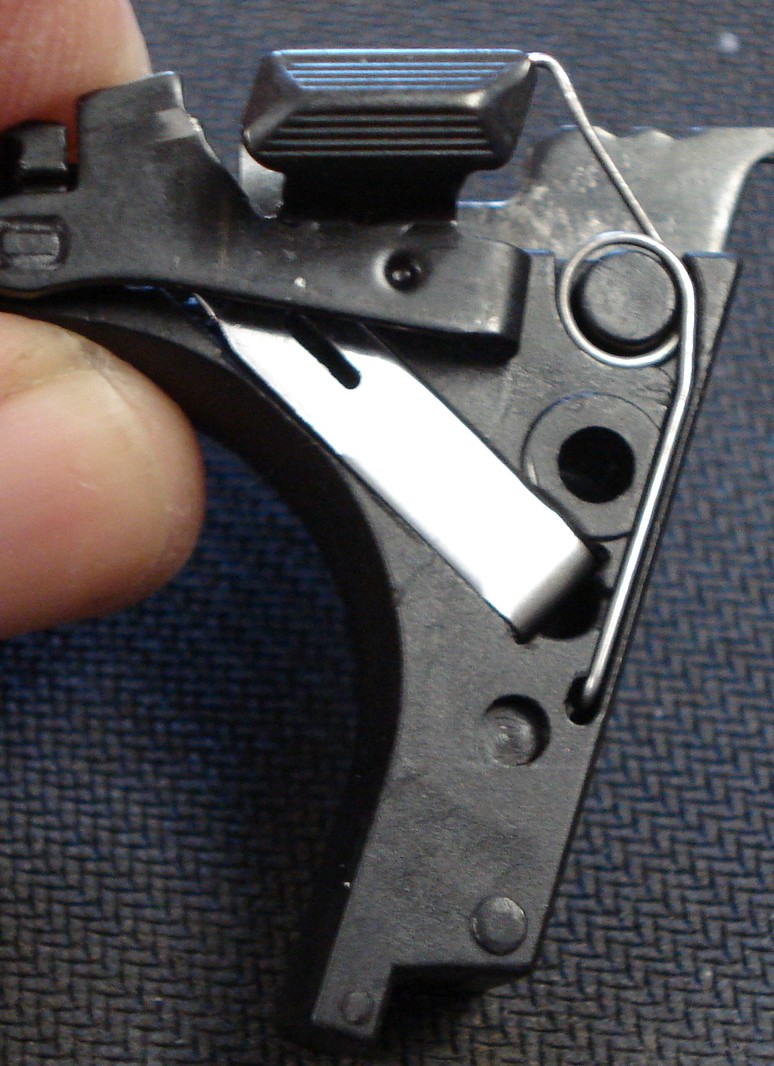
Hook the trigger spring to the trigger bar & install the trigger bar into the housing. You will have to be patient. The trigger bar must be pulled slightly forward and the ejector must be raised to its up-right position to complete the assembly.
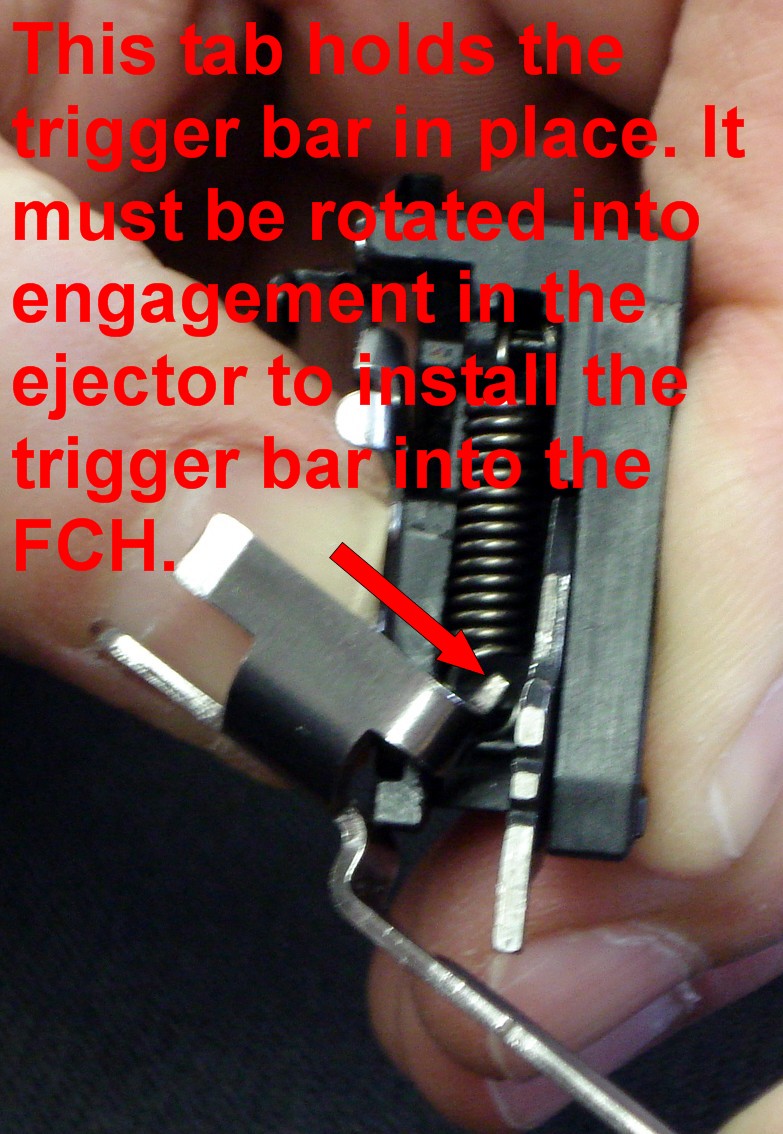
Once assembled the Trigger Mechanism will look like this.

Install in the pistol replacing the pins in the order you removed them paying special attention to the Fire Control Housing Pin (the ejector must be in the mid position for the FCH Pin to be inserted). Functions check and test fire. You are done!
SECTION III: Installation and fitting of the Ghost ROCKET & TACTICAL Trigger Reset Bar w/ TCT & Pistol Reassembly
Please note; because of the TCT, the over-form design of the trigger bar reset guide angle and the upward pressure of the Ruger trigger lift spring sometimes your pistol may not reset during dry-fire. It is important to understand that when you hand cycle your pistol that you are not capable of moving the slide with same level of violence of action, speed and energy it operates at during live fire. This effect does not cause any issues during live-fire, if it is going to happen it occurs only during dry-fire. This is why you need to live-fire test your pistol with ammunition after any and all repairs or modifications.
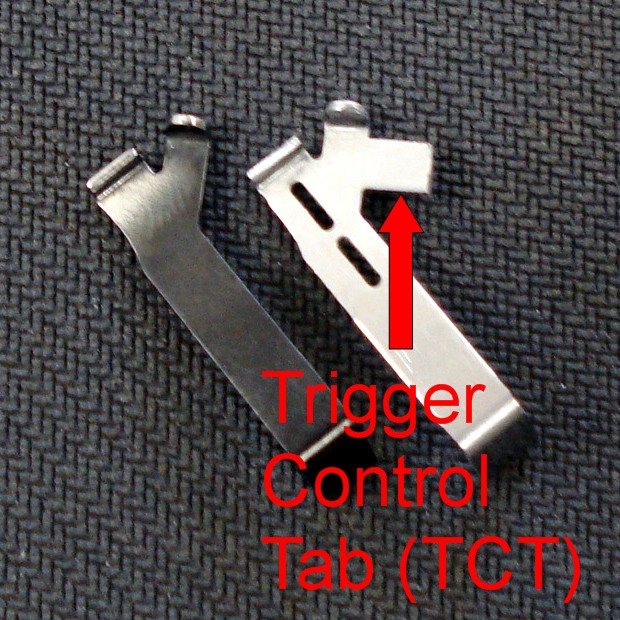
The Ruger Trigger Bar Reset (L) and The Ghost Trigger Bar Reset (R) with patented Trigger Control Tab (TCT). The TCT eliminates over-travel. Also note the debris channels a Ghost Inc. invention these channels remove debris that will choke your normal trigger system. Note: The Dave Spaulding Cut will not work with the Ruger SR Series pistol. You must make your cut to the Trigger Bar Reset's TCT at 90 degrees or a straight cut.
Installing the Ghost Inc. Rocket or Tactical with the TCT for Ruger SR Series. These trigger resets may need the TCT shortened. Shortening the TCT enables the pistol to fire. The TCT acts as a trigger stop and eliminates trigger over-travel. Therefore it is best to Install the FCH and trigger bar assembly back in the pistol. with the Ghost Inc. Rocket or Tactical for Ruger SR Series trigger reset in place. You do need to install the Thumb Safety Assembly and the detent & spring for the purposes of fitting and tuning. Omitting the Thumb Safety Assembly will make the fitting process easier and faster. The Thumb Safety Assembly and the detent & spring must be installed before the pistol is test fired or live fired or carried for any purposes!
Disassemble the pistol as described and depicted in SECTION I
Check the bend of the Ghost Trigger Bar Reset against your pistols. Lay the Ghost on top of the Ruger. Insure they are bent at the nearly the same angle.
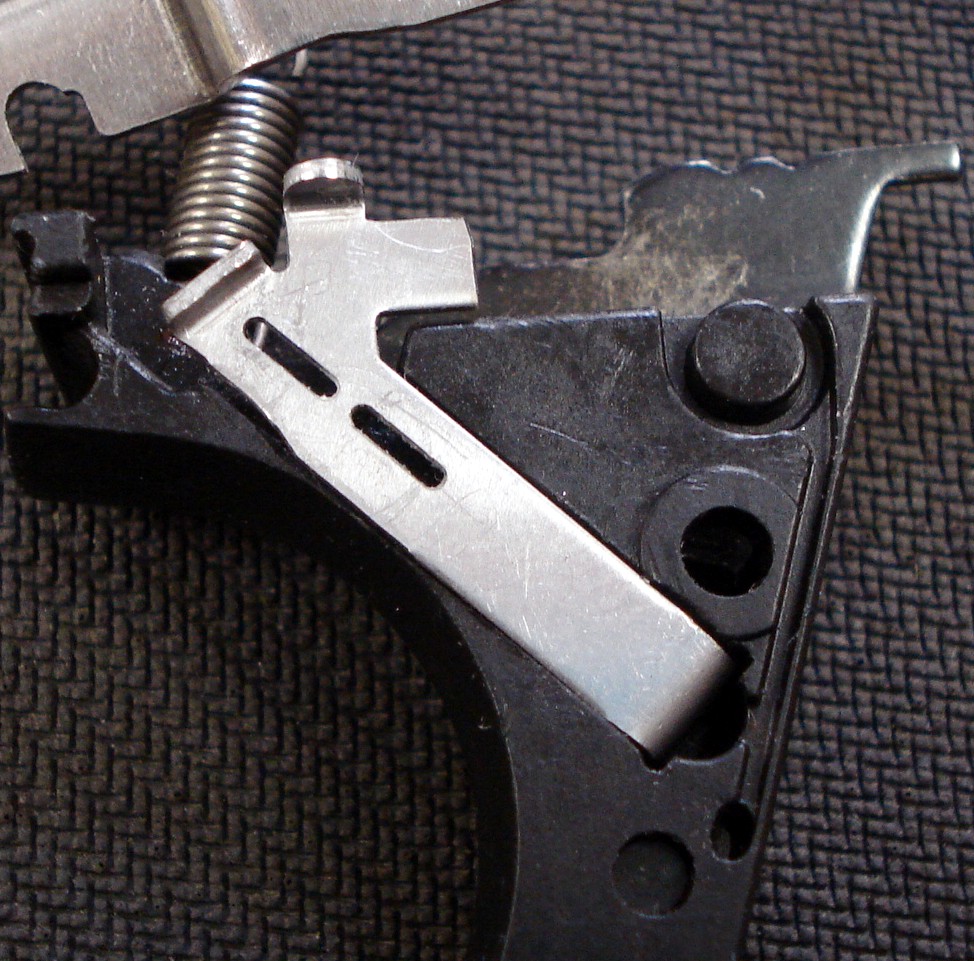
Install the Ghost Inc. Trigger Reset Bar either a Rocket or Tactical with the TCT by pushing the bottom tab into the FCH.
Push the Trigger Lift Spring in. Note the slight bend and angle in accordingly.
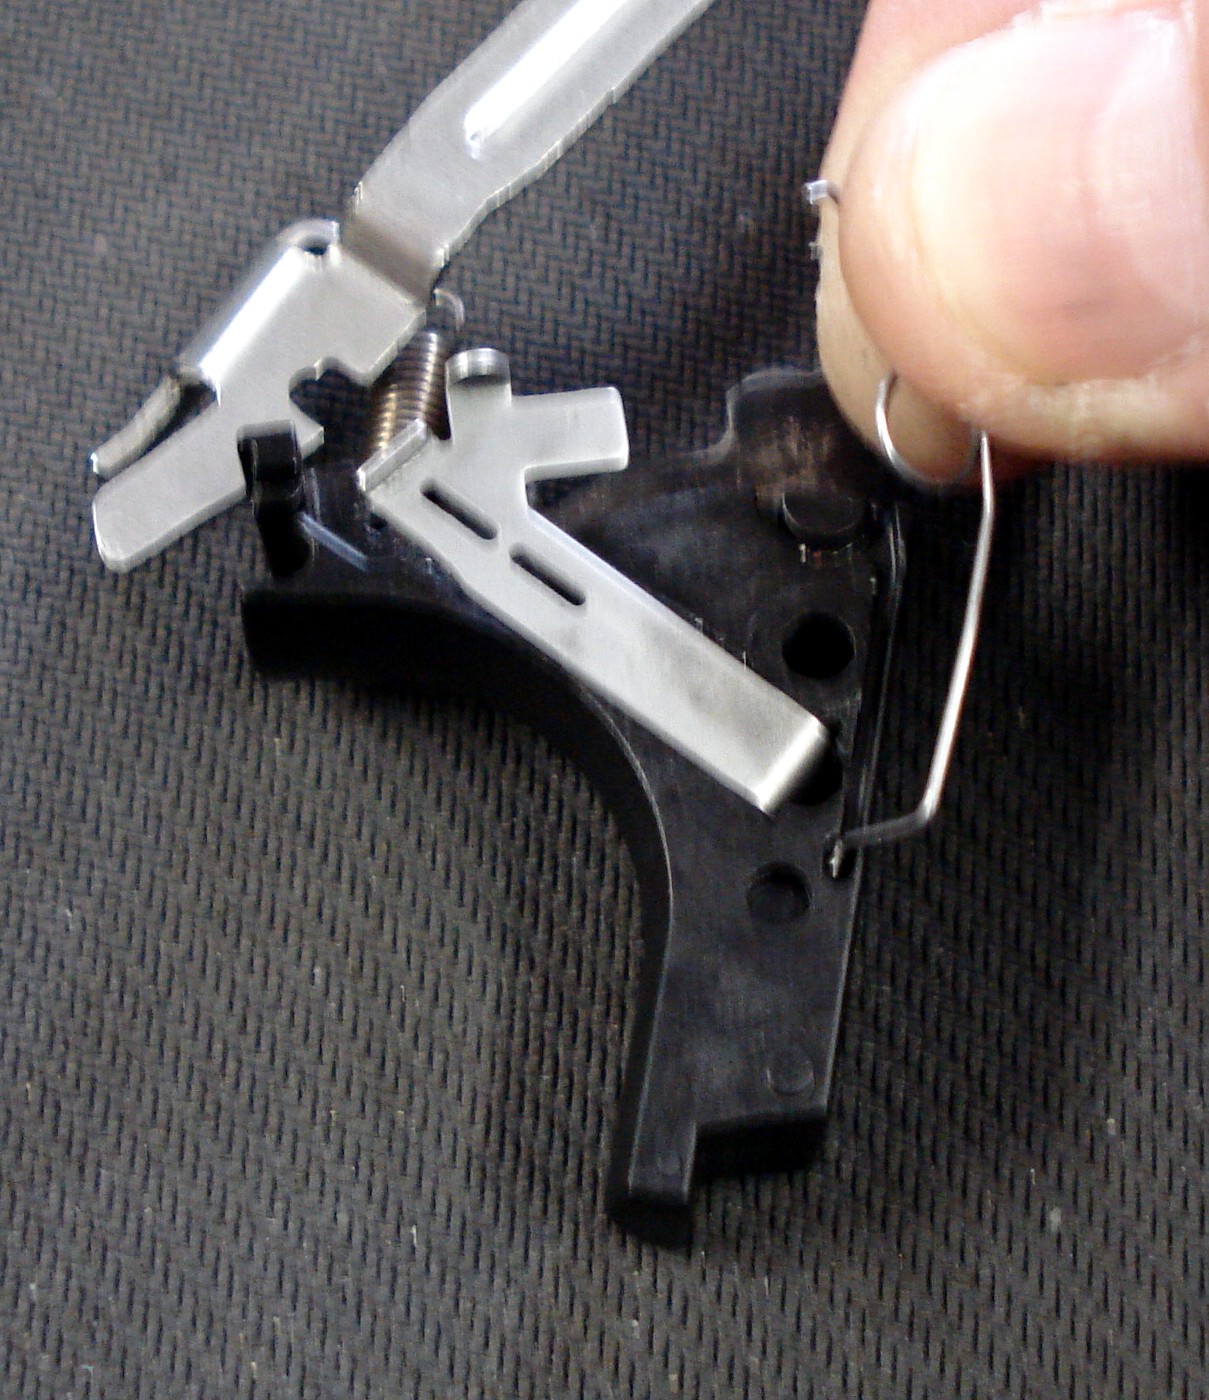
Trigger Reset Bar, Trigger Lift Spring & FCH.
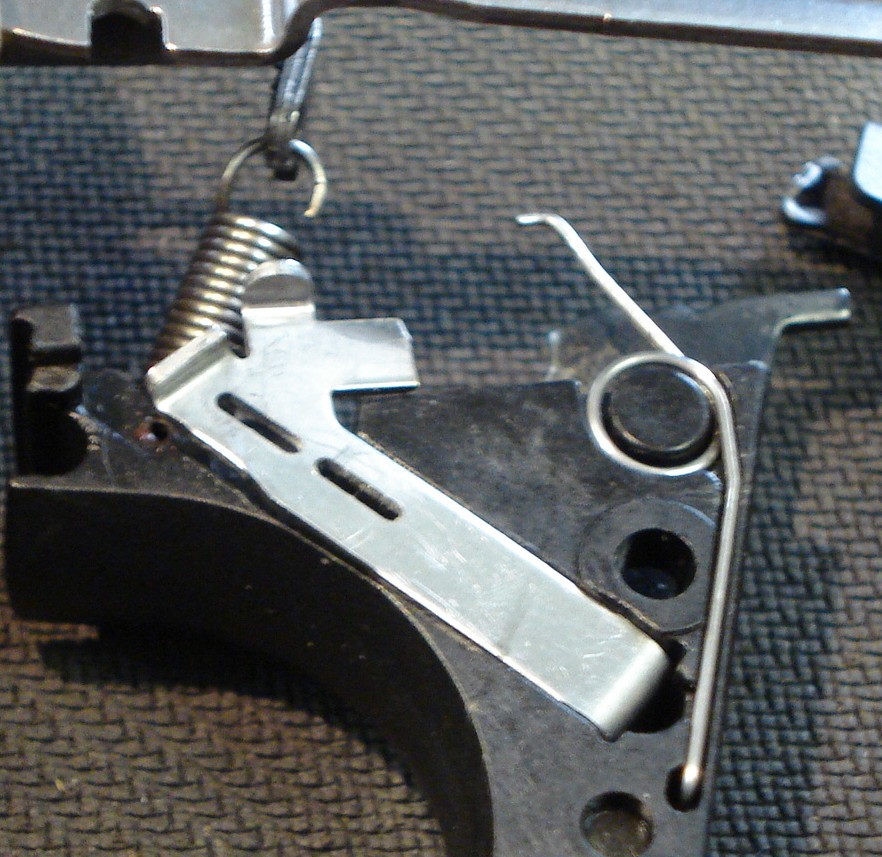
Hook the trigger spring to the trigger bar & install the trigger bar into the housing. Insure you place the leg of the trigger bar into the opening of the ejector. Also make sure the trigger lift spring stays in its mount.
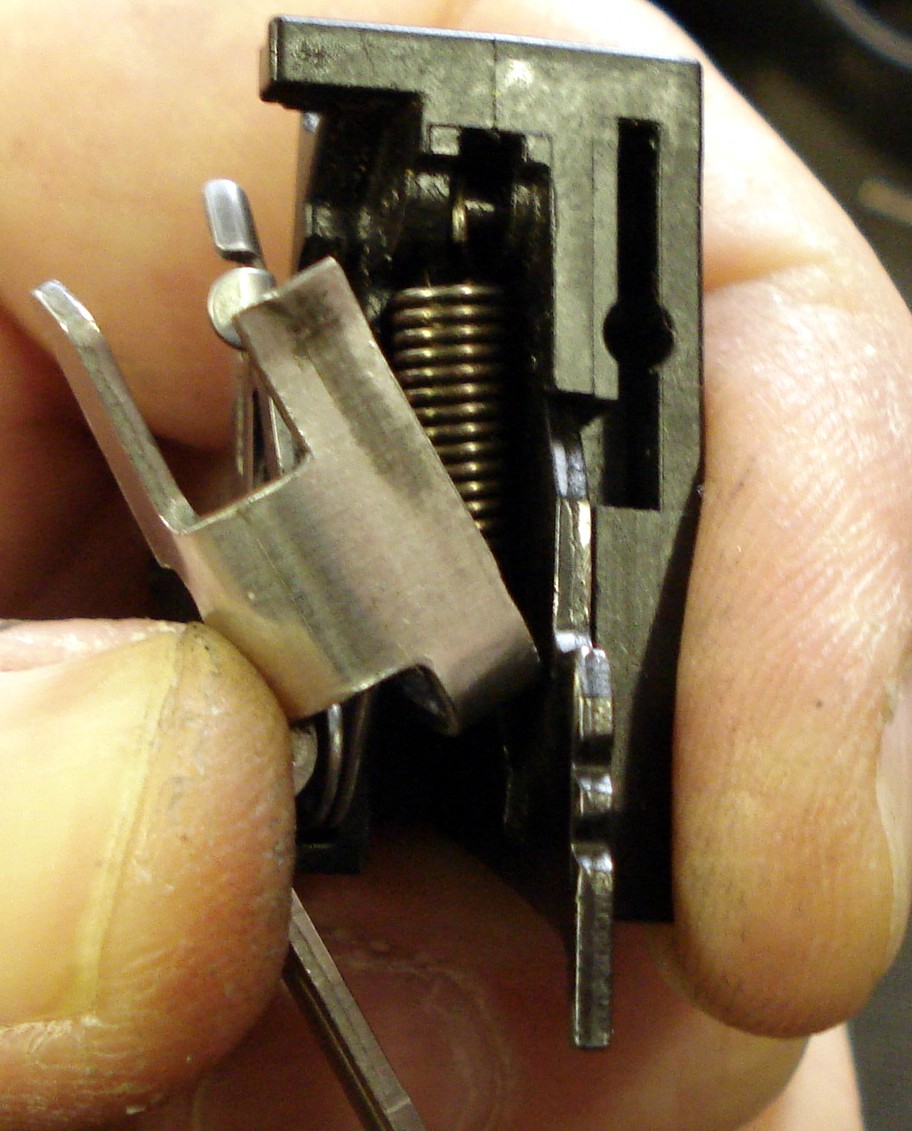

Note the position of the trigger lift spring in the below photos.


The Trigger Assembly ready for insertion into the pistol and for testing and tuning.
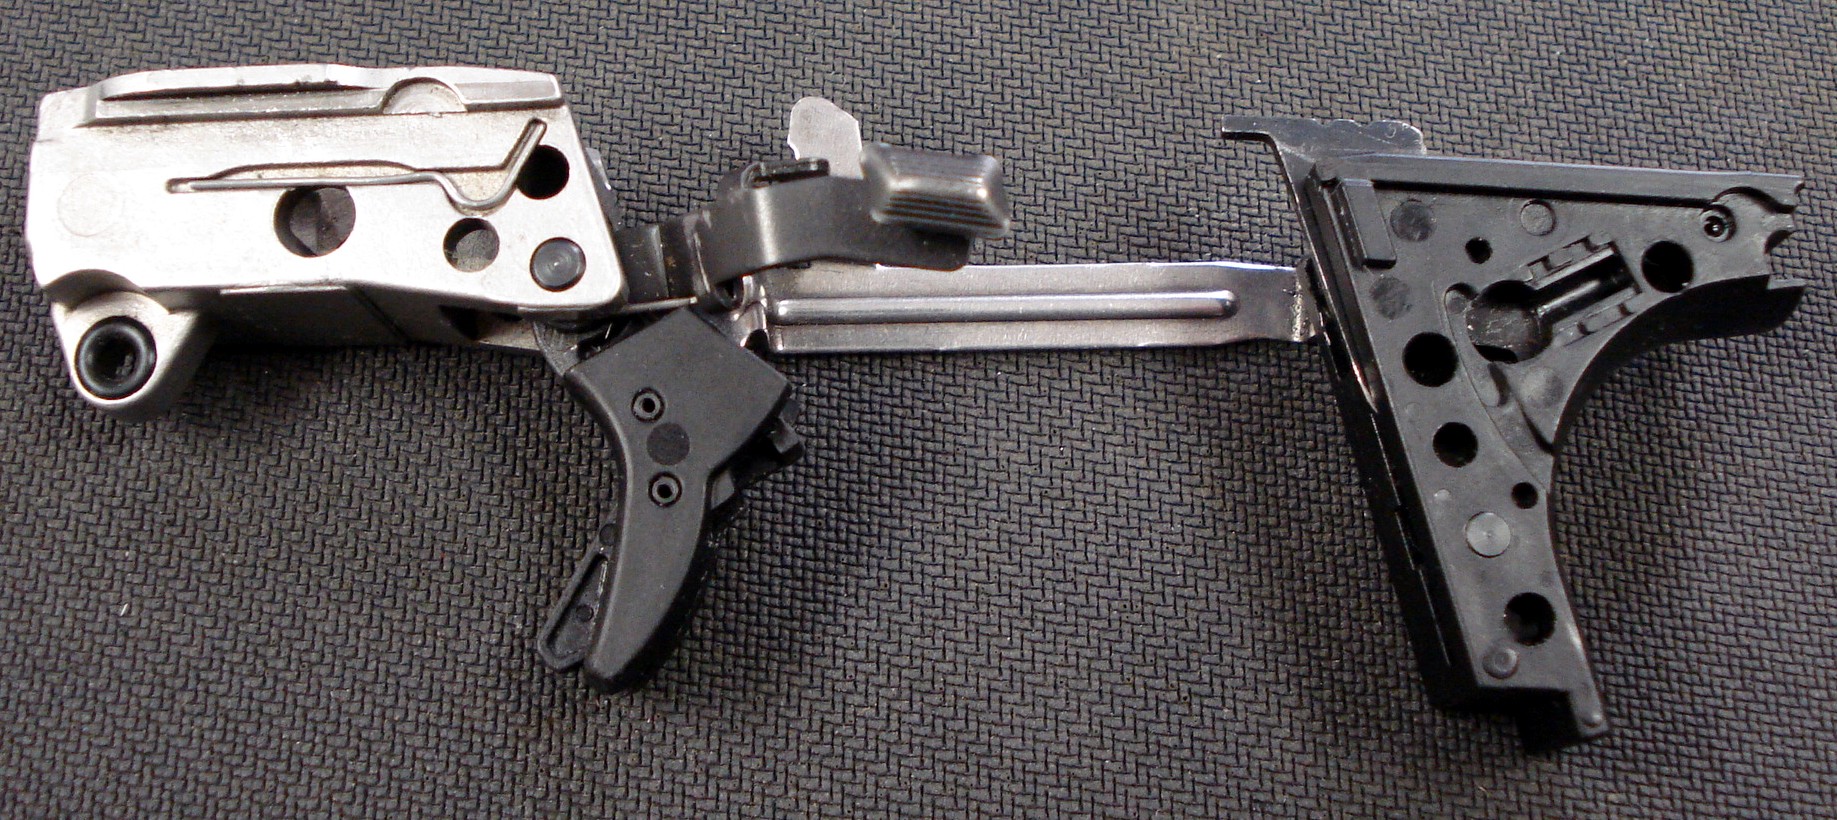
Reassemble the pistol! (see SECTION II) Insure the pistol is unloaded insert the magazine remember the pistol will not function without the magazine & double check. Pull the trigger. If the pistol fires and the trigger stops it's rearward movement at the moment of firing you are done. If the pistol does not fire then you must disassemble (remember the ejector also de-cocks the pistol) the pistol and remove the Rocket or Tactical and shorten the TCT by grinding, dremeling or filing. Shorten very little approximately the thickness of a business card then reassemble and try again and repeat until the pistol fires with no trigger over-travel. This may take many many times be patient it is worth the results!
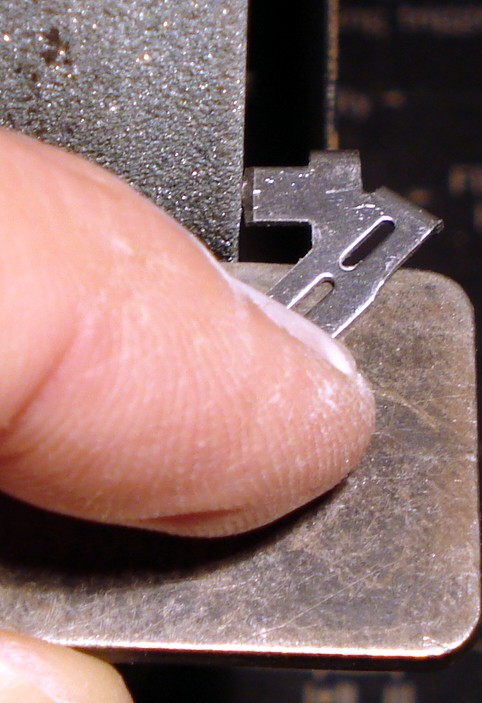
SECTION IV: FINAL ASSEMBLY
Final assembly install the thumb safety assembly with spring and detent. Think this through you have to install the thumb safety spring and detent and rotate the safety up over the trigger bar reset at the same time. It sounds daunting but it really isn't. Look at what you have to do and think it through.
Note: use caution when installing the spring and detent or they will shoot off into outer space and be lost forever if you lose control of them. You may want to place all the parts into a clear large plastic bag for reassembly of these parts. Install the spring first into the hole first then the detent. With a flat object (the old trigger bar reset works well) push the detent in as you rotate the thumb safety up and over the detent.


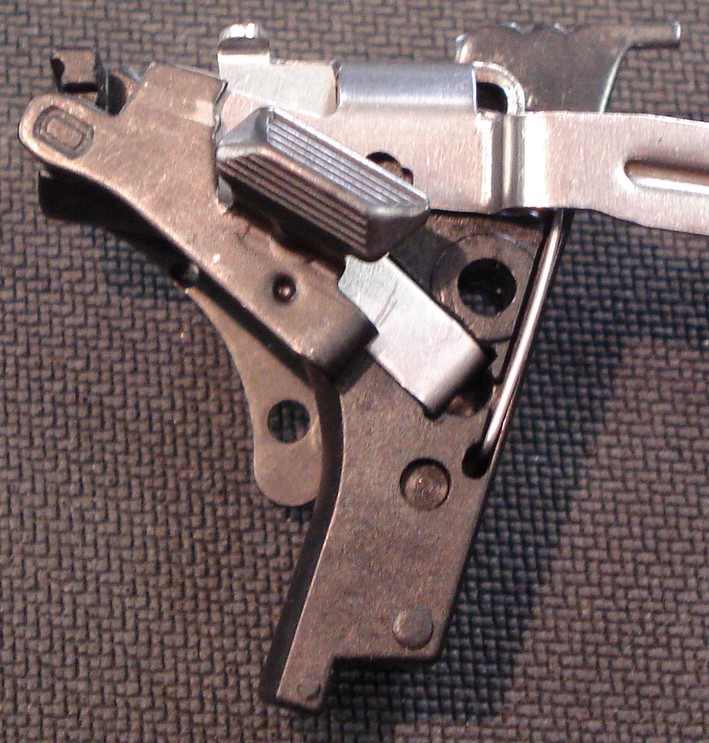
Completed Assembly ready for installation.

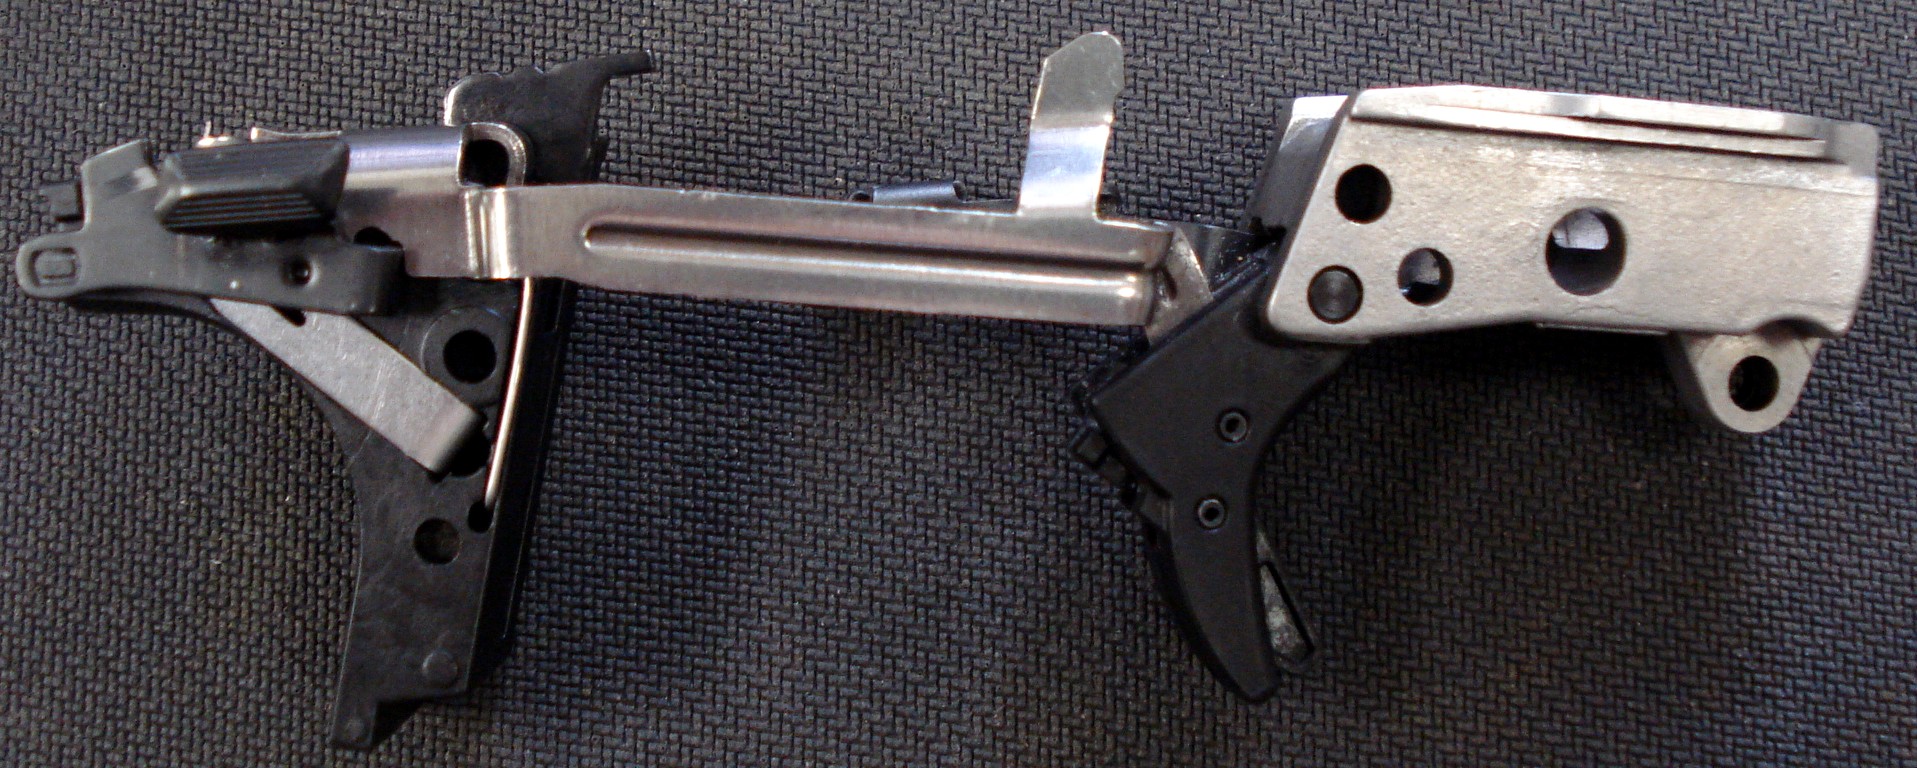
Install the assembled trigger control group in the pistol replacing the pins in the order you removed them paying special attention to the Fire Control Housing Pin (the ejector must be in the mid position for the FCH Pin to be inserted). Functions check the pistol and test fire. You are done!
SECTION V: TROUBLE SHOOTING
| PROBLEM | SOLUTION |
| Pistol does not fire. | TCT is too long or connector is bent too far inwards. Shorten TCT and or bend connector outwards. |
| Pistol fires sluggishly. | TCT maybe too long. Shorten TCT. |
| Trigger does not reset. | Connector maybe bent too far inwards. |
| Trigger resets with a louder than normal "click" and there is a noticeable increase dragging on the slide when operated. | Connector maybe bent too far outwards. |
| Light primer strikes. | Replace recoil spring or pistol may not be in battery. |
| Light primer strikes. | Option 2-Shorten TCT an additional .01 or until pistol fires. |
| Trigger feels rough. | Check connector & trigger surfaces for burrs of metal caused by the shortening and or manufacturing process. Remove burrs and or replace the trigger bar. |
 Loading... Please wait...
