- Home
- THE PISTOL
- MISC GLOCK ACCESSORIES
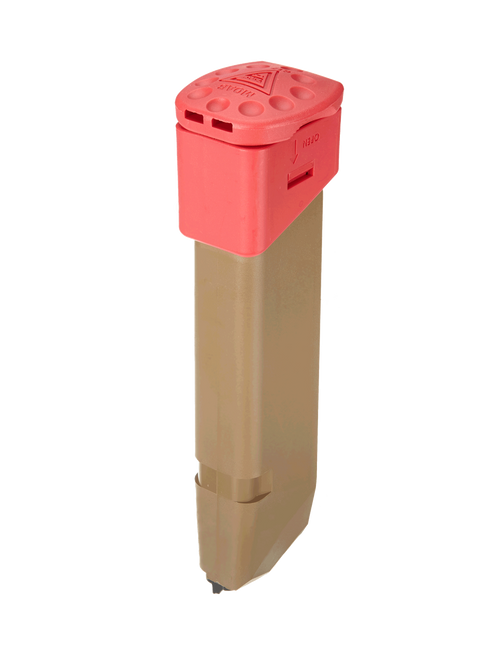
- PLUS 6 MOAB FOR GLOCKS - RED
- Home
- THE PISTOL
- GLOCK MAGAZINES AND MAG ACCESSORIES
- PLUS 6 MOAB FOR GLOCKS - RED
- Home
- THE PISTOL
- MOAB® - MOTHER OF ALL BASEPLATES
- PLUS 6 MOAB FOR GLOCKS - RED
Other Details
Find Similar Products by Tag
Find Similar Products by Category
Product Description
PLUS 6 MOAB (Mother Of All Baseplates)
FOR GLOCKS GEN 1-5 IN RED
DOES NOT WORK ON 10rd GLOCK MAGS
Features:
- Adds 6 Rounds to 9mm and 5 rounds to .40acp & .357 Glock's Magazines!
- Works on 19X, 17, 17L, 18, 22, 24, 31, 34, 35, 37, 45 & 47
- Stainless steel extra power magazine spring included
- Rounded ergo design
- Positive mag seating
- Extraction Traction Points
- Debris extraction ports
- Superior tough construction
- No more painful corner spikes in your palm
- Ghost unconditional lifetime warranty!
These are too long for "Limited Class" magazines, limited class maximum length is 140.25mm. They will work for “Open Class” with a maximum length of 170.25mm.
It adds 1.655” to the length and overall mag length is 149.45mm.
Installation Instructions:
The Ghost MOAB magazine extension for Glock factory 17 9mm/15 .40 S&W round magazines consists of 3 items which make up the magazine extension assembly;
- The Sleeve-the rectangular piece that you may look through-Assembly
- The MOAB Spring-the coil stainless steel spring that powers the extension-Assembly
- The MOAB Base-the MOAB that inserts into the sleeve-Assembly
Prior to installation of Ghost MOAB magazine extension, you must remove the (1) existing magazine baseplate (2) magazine baseplate insert, (3) the magazine spring and (4) remove the follower from the spring, you will reuse only (4) the follower. Place the unused parts in suitable storage container and label them for possible future use-Caution the contents are under the pressure of the magazine spring, eye protection must be worn when manipulating springs.
Note: Once removed you may want to consider cleaning the magazine body.
- Slide the Sleeve part number one (1) with the shortest side oriented along the rear of the magazine until it can go no further.
- Attach the spring into the follower you removed from the host magazine. You will notice that the spring is not symmetrical there is a large end (bottom) and a small end (top). This small end snaps into the follower (if it does not completely snap in you may still install the follower partially on the spring after a loading it will seat onto the spring). Now with the follower attached to the spring insert them all into the magazine until you see the follower is at the limit of it’s travel in the magazine. There will be many coils extending below the sleeve.
- Grip the magazine body firmly so that you can push down on the installed MOAB Sleeve (1) towards the bottom of the magazine. This downward pressure will aid in locking the MOAB Base (3) into the sleeve when you join them.
- With the MOAB Base (3) use it to capture the large end or bottom of the spring.
- Push the MOAB Base (3) with the MOAB spring (2) into the MOAB Sleeve (1) until it locks, it should make snapping sound-you’re done!
- To remove reverse the process. To remove the base, you will need an armorers tool or screw driver to compress and unlock the base. We designed these to stay on!!
 Loading... Please wait...
